Threat Response - Integration with BlueCoat
This section covers all aspects of Threat Response integration with Blue Coat ProxySG. The Proofpoint Threat Response platform can integrate with Blue Coat in the following ways:
- As an enforcement device
Blue Coat ProxySG can be used to prevent users from accessing malicious URLs. Threat Response can place URLs reported in security alerts into a Threat Response block list, which is then referenced by Blue Coat ProxySG.
Configuring BlueCoat device
The steps below detail the process for configuring Blue Coat ProxySG to periodically poll Threat Response for a list of malicious URLs. Any URLs placed into this list in Threat Response will be blocked by the Blue Coat ProxySG.
1. Create a URL List in Threat Response
The first step in enabling Threat Response to push malicious URLs to Blue Coat is to create a URL list in Threat Response to hold all of the bad URLs. This will later be sync’d to Blue Coat for use in policies. Follow the steps below to create the URL list.
- Log in to Threat Response.
- Navigate to the
Listspage. - Click on the
URL Listssub-tab to manage yourURL Lists. - Click the blue
Add (+)button next toURL Liststo bring up theNew URL Listpanel. - Set the following fields:
- Name:
<list_name> - Description:
<list_description>(Optional) - Publish:
checked
- Name:
- Save changes.
Note
Note that this list has been published. This is necessary to allow Blue Coat to poll Threat Response for list updates. This polling will be configured in Step 3 below.
2. Configure Blue Coat Policy Referencing the List
With the URL list created in Threat Response, we can now configure a Blue Coat policy to block any URLs that get placed on this list.
- Log in to Blue Coat ProxySG.
- Navigate to the
Configuretab. - Click on
Advanced configurationto open the advanced configuration editor. - In the left navigation menu, navigate to
Policy>Policy Files.

- Change the install policy by performing the following steps:
- Set the
Install Local Filefrom drop-down toText Editorand clickInstall. - Input the following for the local file text contents:
- Set the
<proxy>
url.category=NetCitadel_List_1 exception(content_filter_denied) 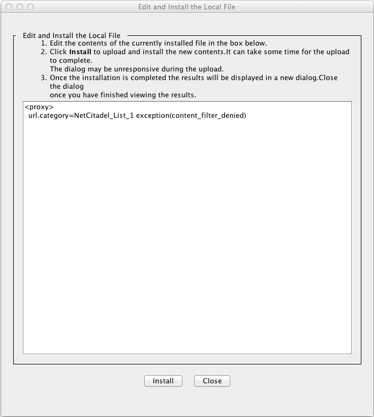
- Click
Installto activate the local file. - Click
Closeto close out of the text editor. - Back in the
Policy Filesconfiguration, check the box to enableAutomatically installnew policy when central file changes. - Click
Applyto activate the new settings.
Note
The category name that you create in step 3-b above needs to reference the appropriate Threat Response list ID. The list ID can be found in the list URL copied during the Threat Response setup. See the example below for details.
Example list URL: https://ptr.example.com/lists/url_lists/5/members.bluecoat
Correct category name to use for “list 5”: NetCitadel_List_5
Correct local file contents:
<proxy>
  url.category=NetCitadel_List_5 exception(content_filter_denied)
3. Configure Blue Coat Synchronization Interval
This last step tells Blue Coat which URL to pull the list information from, and sets the update interval.
- Copy the
Published URLfor the list in Threat Response.- Log in to Threat Response.
- Navigate to the
Lists>URL Listspage. - Click the appropriate list to bring up the List Details panel on the right.
- Click the
Show published URLlink in theDetailspanel to display the URL to copy/paste into Blue Coat.

- SSH in to the Blue Coat ProxySG.
- Run the following commands (inserting the published URL into the policy configuration):
dev-bluecoat01> enable
dev-bluecoat01# configure terminal
dev-bluecoat01# (config) policy central-path <Published_List_URL>
dev-bluecoat01# (config) policy poll-interval 1
The Blue Coat ProxySG is now configured to continuously poll Threat Response for URL list updates every 1 minute. Any updates will be pulled over automatically.