Threat Response - Integration with IBM Domino
This document covers the Threat Response integration with IBM Domino mail servers to enable email quarantine capability. Threat Response provides the ability to manually or automatically remove malicious emails from a user’s mailbox.
Note
Support for IBM Domino was introduced in version 3.6.0 of Threat Response
Supported Domino versions include:
| Platform | Version |
|---|---|
| Domino Server | Supported: 9.0.1 (Fix-Pack 10) running on Windows Server |
Feature set:
Supported
- Basic auto and manual quarantine
- Undo quarantine
- Distribution list expansion
Not Supported
- Search & Quarantine (when message-ID is missing in TAP alert)
- Abuse mailbox
- Forward following
Distribution List Expansion
Threat Response only supports expansion for members of distribution lists that have SMTP addresses
Domino Configuration
Quarantine responses are supported by a server-based agent. Quarantined messages are stored in a dedicated quarantine database on each Domino server that the agent is deployed to.
Deploy the Proofpoint Domino Agent
- Select a server in your environment to host the agent template file
- Copy
proofpointagenttemplate.ntftoC:\Program Files\IBM\Notes\Data - Open IBM Domino Admin
- Click
File>Open Server - Select your server name from dropdown list
- Click the
Filestab - In the top right, select
Templates Onlyfrom theShow medropdown - Verify that you see
Proofpoint Agent Templatein the file list
- Open the IBM Domino Designer application
- Click
File>New>Application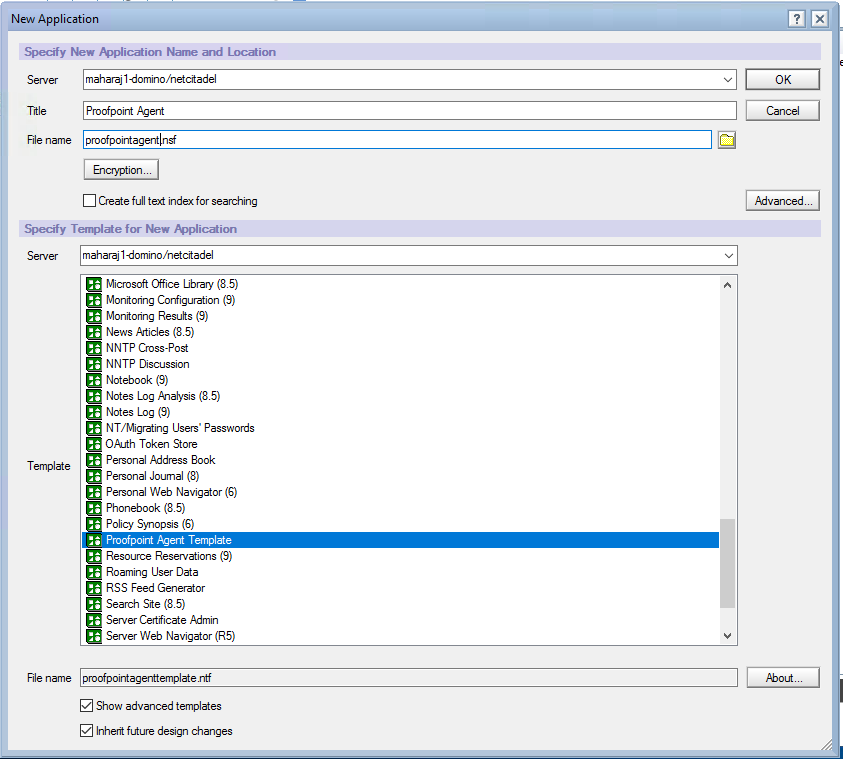
- In the
Serverfield select the name of your local server from the dropdown list. Do not select Local. - In the
Titlefield enter “Proofpoint Agent” - In the
File namefield enter “proofpointagent.nsf” - In the next
Serverfield select the name of your local server from the dropdown list - Click the
Show advanced templatescheckbox - Select
Proofpoint Agent Templatefrom the Template list - Click
OK - You now have a new agent application open in the Designer
- In the
Applicationspane on the left, right-click onProofpoint Agent -
Select
Application>Sign Design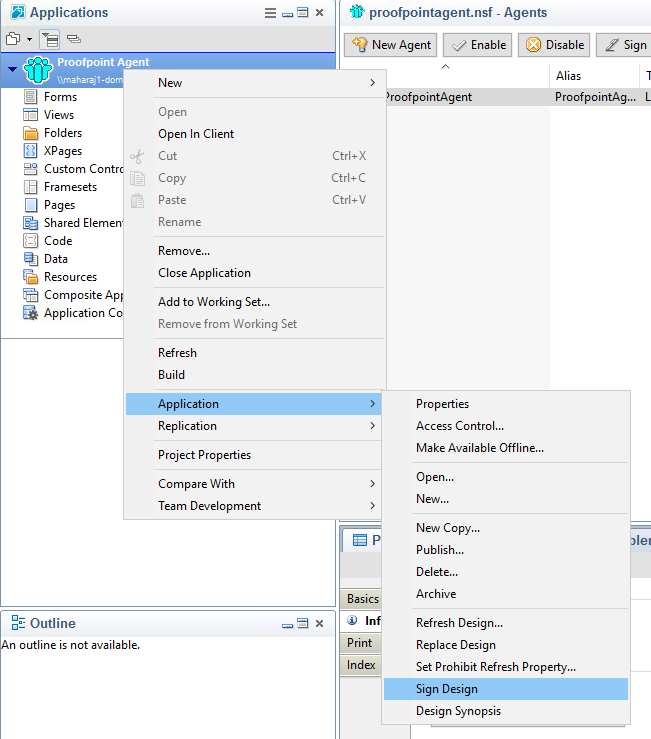
Grant the Service Account Permissions
The agent is invoked by the account that you have configured in the Domino Settings page of PTR.
-
Grant the account “Sign or use restricted IBMScript/Java agents” privileges in IBM Domino Administrator.

-
Click
Save & Close -
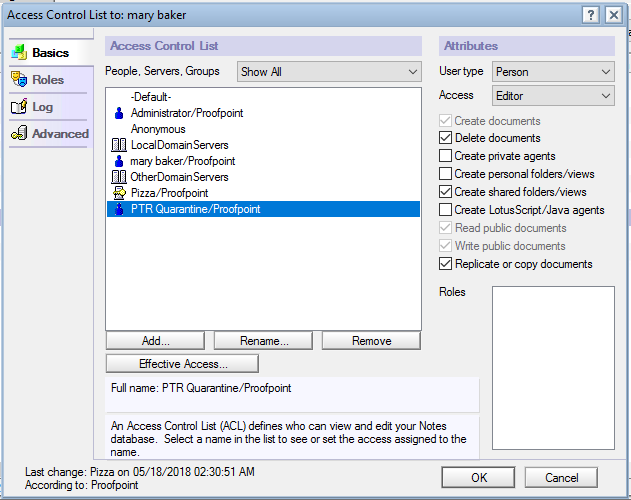
The account also requires “Editor” access to all mail files on the configured servers that will be quarantined from.
Agent Replication
You now have a new agent application on your server and are ready to replicate it to your other servers.
The replication topology is entirely at your discretion. It might be easiest to pick the current server to act as the master and have it push the agent database to the other servers in your environment.
Important
Quarantine will only occur on the servers that host a copy of the agent and those agents will only perform quarantine operations on co-resident mail databases.
Threat Response Configuration
Configuring Threat Response for Domino integration requires that you create one or more Domino Servers. This configuration will hold all of the information that Threat Response needs to interface with Domino to quarantine messages, including the service account that will be used to invoke the agent.
Important
If the Domino server contains only a partial replica of the global address book, additional Domino servers must be added to ensure resolution of all addresses is possible.
Configuring Domino Connectivity in Threat Response
In order for Threat Response to communicate with the Domino mail environment it must be properly configured in the System Settings.
To add a Domino server in the System Settings:
- Log in to Threat Response.
-
Using the top menu bar open the settings menu and navigate to the
System settingspage.
-
Navigate to
Email Integration>Domino Servers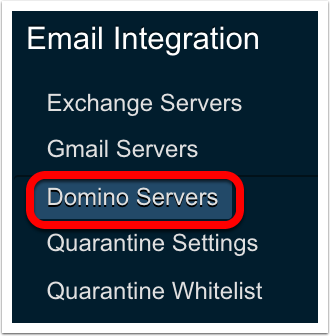
-
Click the blue
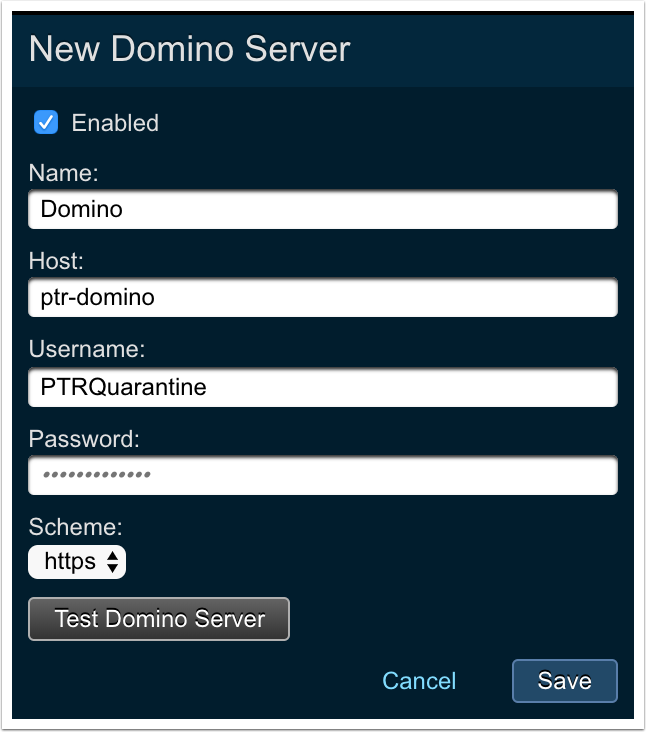
Add (+)button next toDomino Serversto bring up theNew Domino Serverpanel.
-
Set the following fields:
- Enabled: Check the box if you want to enable the configuration for the Domino server; if off, the configuration will be saved but not enabled
- Name: A label / name for this Domino Server.
- Host: The Domino server that can resolve the email addresses in the alerts. Must have the Proofpoint Domino Agent installed.
- Username: Username used to login to Domino (typically a service account).
- Password: Password used to login to Domino.
- Scheme: The protocol (HTTP or HTTPS) that Threat Response uses to communicate with the Domino server.
-
Click
Saveto complete the configuration.
The Test Domino Server button enables the user to test the configuration prior to saving.
With a successful configuration in place, you will see a green status icon next to the newly created Domino Server in Threat Response.
