Threat Response Integration with Google G Suite
This document outlines the process for integrating Proofpoint Threat Response with Google’s G Suite, specifically the Gmail app, to perform email quarantine actions. This action can be configured to take place automatically (via a match condition), manually by an authorized responder or a combination of the two.
It is possible to enable multiple G Suite instances on a single Threat Response system. The system will query each configuration until it either receives a successful reply or it exhausts all the enabled configurations.
The following information is necessary to complete this integration:
-
An instance of Proofpoint Threat Response v3.4 or higher
Note
Basic G-Suite support was added in v3.4 of Threat Response. Beginning with the v3.5 release, multiple advanced features are included that provide parity with email quarantine for Exchange and O365 environments.
-
Administrator level access to the Google Apps instance and to the developer console.
-
An open project slot in the project quota.
-
A quarantine mailbox within the Gmail app.
-
A mailbox with admin-level access to your Google Apps Domain is required for distribution list expansion.
-
The service account ID (the creation of which is outlined in this document).
-
Service account private key (the creation of which is outlined in this document).
Configuring G Suite and Proofpoint TRAP
Create New G Suite Project
-
Login to Google Apps with administrator privileges.
-
Open the developer console https://console.developers.google.com/.
-
Create a new project by navigating to “Dashboard” and selecting the drop-down menu to view a pop up window. Click ‘New Project’.


-
Give the new project a name (cannot exceed 30 characters), make note of the project ID and click “Create”. Select “Create” after naming your new project.

Enable Gmail API
Note
If the necessary APIs or services are already enabled, proceed to Create Service Account Key Credentials.
-
Click on ‘Enable APIs and Services.

-
Select Gmail API on the API Library screen or by using the toolbar to search for it.

-
Once the Gmail API has been selected, click ‘Enable’ to enable the API.

Create Service Account Key Credentials
-
Create credentials to access the API by clicking on Credentials > ”Create credentials”.

-
Under “Create credentials” and select “Service account”.

-
Give the service account a name and this will populate the Service account ID field. Click “Create”.

-
Click on the ‘Select a role’ drop down and search for “Project” and then “Owner” to give full access to all resources. Click “Done”.

-
Look for your newly created service account and click on the pencil icon for edit on the right hand side.

-
Scroll down to the bottom, under the “Keys” section, click “Add Key” then “Create New Key”.

-
Choose P12 Key and click “Create”

-
The default password for the private key is “notasecret”. This should not be changed as the Threat Response Platform automatically uses this to open the file. Click “Close” and save the key locally.

Enable G Suite Domain-wide Delegation to the Service Account
-
On the same window where you just created the key, above you will see the option to click “Show Domain-Wide Delegation”.

-
Tick the box “Enable G Suite Domain-wide Delegation. It may be necessary to assign a product name or configure the OAuth consent screen. Click “Save” when finished.

Copy the Client ID
-
From the Credentials view, click the copy button to copy the Client ID. This is needed to manage the API Client Access.

Manage API Client Access
-
Open a new browser tab to your Google Admin Console, https://admin.google.com/.
-
Select “Security Configure security features”.

-
Scroll to the bottom and select “API Controls”.

-
Scroll down to “Domain wide delegation” and click on “Manage Domain Wide Delegation”.

-
Beside “API Clients” click “Add new”

-
Paste the Client ID you previously copied into the client name field.
-
In the API Scopes field copy and paste the entry below and then click “Authorize”:
https://mail.google.com, https://www.googleapis.com/auth/admin.directory.group, https://www.googleapis.com/auth/admin.directory.group.readonly

Enable Admin SDK
-
Navigate back to the developer console https://console.developers.google.com/ and click on “ENABLE APIS AND SERVICES”. Type “Admin SDK” into the search bar and select the Admin SDK tile.

-
Enable the Admin SDK API (necessary for quarantining messages sent to google groups).

Create Quarantine Mailbox
-
From the Google Admin Console https://admin.google.com/ “hamburger” menu, select Directory > Users.

-
Click on the “Add new user” button.

-
Enter the first name, last name, and password for the quarantine account. Turn off “Ask for a password change at the next sign-in”.

-
Click on Add new user.

-
Click Done.
Login to Quarantine Mailbox
-
In a new browser tab, access https://www.gmail.com.
-
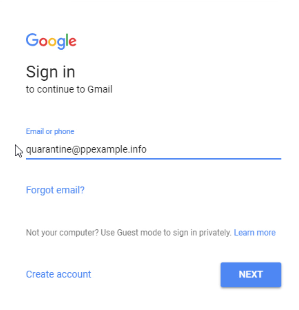
Enter the quarantine user’s email address and click Next. Enter the quarantine user’s password and click Next.

-
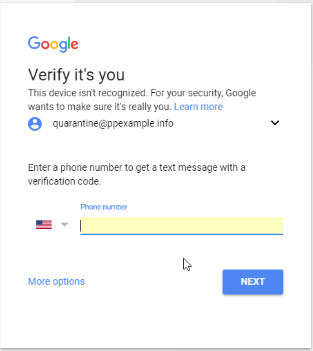
On the first login you may be required to enter a phone number to verify your account.

-
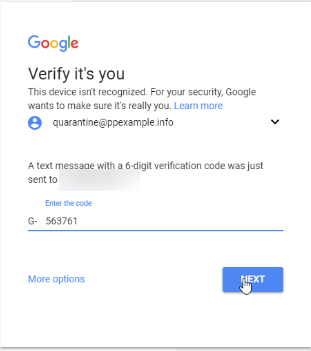
Enter the code and click Next.

-
On the first login you will need to accept the Google Terms of Service. Click Accept.

-
The email account is now usable.

Proofpoint Threat Response Configuration
Add Gmail Configuration
-
Login to Proofpoint Threat Response with an administrator level account.
-
In the top right corner click on the gear shaped icon and select “System Settings”.

-
Under Settings > Email Integration select “Gmail Servers”.

-
Click the “+” symbol next to “Gmail Servers” in the center column.

-
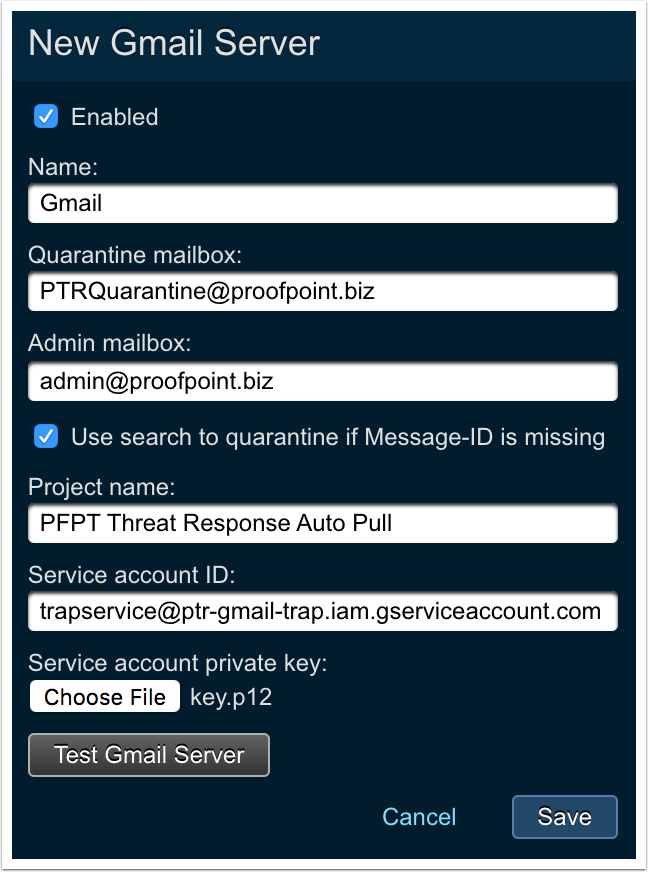
Under the “New Gmail Server” configuration ensure that “Enable” is checked and enter the following information:

- Name: An internal name for the server configuration.
- Quarantine Mailbox: The SMTP address of the mailbox that quarantined messages are sent to.
- Admin Mailbox: The SMTP address of a mailbox with admin-level access to your Google Apps domain (required for distribution list expansion).
- Use search to quarantine…: Check this option to fallback to searching the mailbox for the message if the message-ID is missing from the alert, and the alert type is URL-based.
- Project name: The Google project name that you created earlier in this guide.
- Service account ID: The Google service account ID or client ID.
- Service account private key: The service account private key in p12 format.
-
Click “Test Gmail Server” to validate that the configuration.

-
The result of the test will appear above the “Enabled” checkbox.

Note
The Service Account Private Key may need to be re-entered after testing
-
Click “Save” in the bottom right hand corner to save the configuration.

-
Validate that there is a green status indicator for the configuration added.

Concurrent Quarantine Attempts
Info
It may be necessary to restrict the number of concurrent quarantine attempts to prevent the service account from being throttled.
-
Login to Proofpoint Threat Response with an administrator level account.
-
In the top right corner click on the gear shaped icon and select “System Settings”.

-
Under Settings > Email Integration select “Quarantine Settings”

-
Under “Concurrent quarantine attempts” enter the maximum number of concurrent quarantine attempts for Threat Response to try and then click save.

Note
Attempts over the threshold will be queued for further processing