Threat Response - Integrating with Proofpoint Internal Mail Defense (IMD)
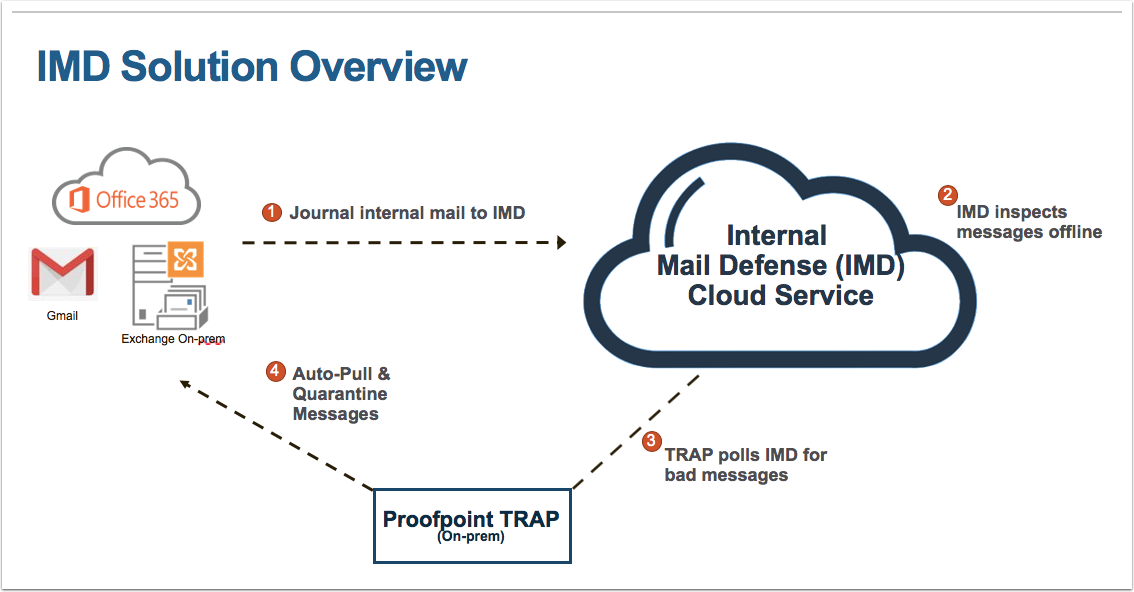
Internal Mail Defense (IMD) detects and remediates threats that originate from internal email by leveraging the journaling functionality in Exchange / Office 365. It protects internal mail against malware, advanced threats and spam. Remediation is performed by auto-pulling and quarantining bad messages. The service has absolutely no impact to existing mail flow and end user experience.
Note
Internal Mail Defense (IMDv2) requires Threat Response 4.6.1 or later but the latest official release is recommended.
Configuring Exchange / Office 365
Creating the send connector
In order to ensure that journaled email reaches the IMD platform without being modified or potentially blocked, it is important to create a send connector to ensure direct delivery of the journal traffic.
Send connector details:
- From Exchange / O365 to Partner Organization
- For messages sent to the following domain: imd.proofpoint.com
- Choose the radio button for “Route email through these smart hosts” and enter the MX records or the IPs for your Proofpoint IMD cluster
- Use TLS
- Validate the connector using the journal address journal@imd.proofpoint.com
Creating the Journal rule
IMD requires all internal mail traffic be journaled to a customer-specific email address in our data centers. This traffic is then analyzed, and alerts are generated for any malicious messages we find.
Journal rule details:
- Internal messages
- All users (can be restricted to a group for testing)
- Journal to the address provided by Proofpoint
Note
It is not recommended to enable the journal rule before the Threat Response part of the configuration has been completed and tested. It’s also not recommended to enable the journal rule until the IMD cluster is fully configured and the full two hour propagation time has passed since creating the connector.
Configuring Threat Response for IMD
The steps below describe the process of integrating IMD in Threat Response.
Threat Response queries the IMD data center for alerts using a Python ETL script linked to a scripted poller source. Before creating the new source, the script, and some supporting data must be added to Threat Response.
Important
You must be logged in to Threat Response with an account that is part of both the Admins and Script Admins teams to make the necessary configuration changes.
Adding the ETL script
Note
Your professional services consultant will provide you with the required python script.
-
Navigate to the
Scriptspage in Threat Response.
-
Select
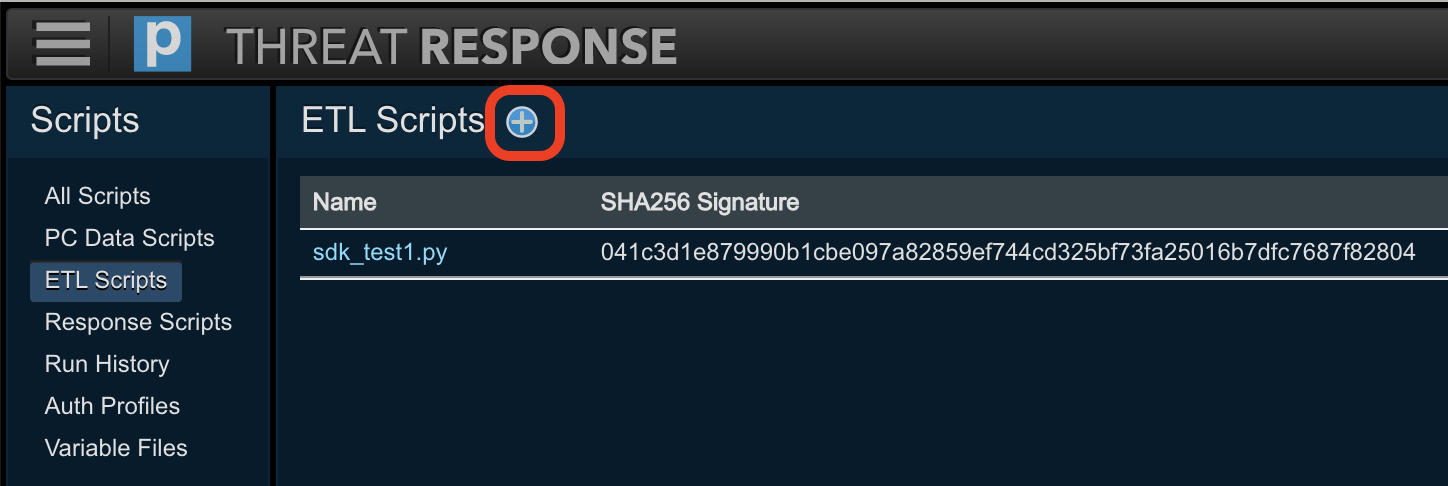
ETL Scriptsfrom the menu on the left. -
Click the Add (+) button in the header section of the left panel to open the Add ETL Script panel on the right.
-
Choose the
IMD_Pollerscript file you wish to upload and enter an optional description.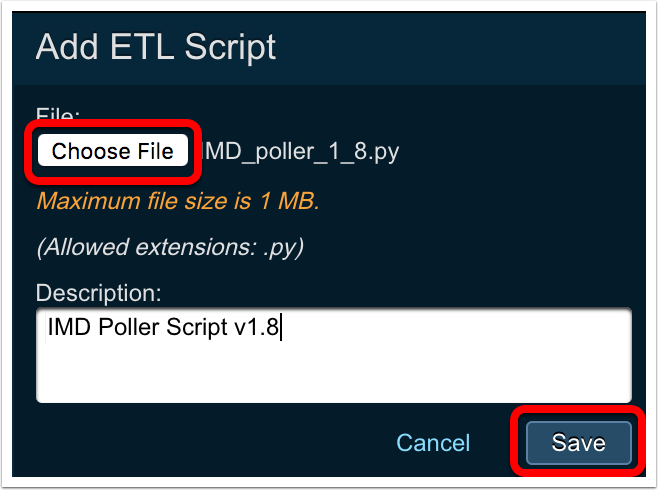
-
Click
Save
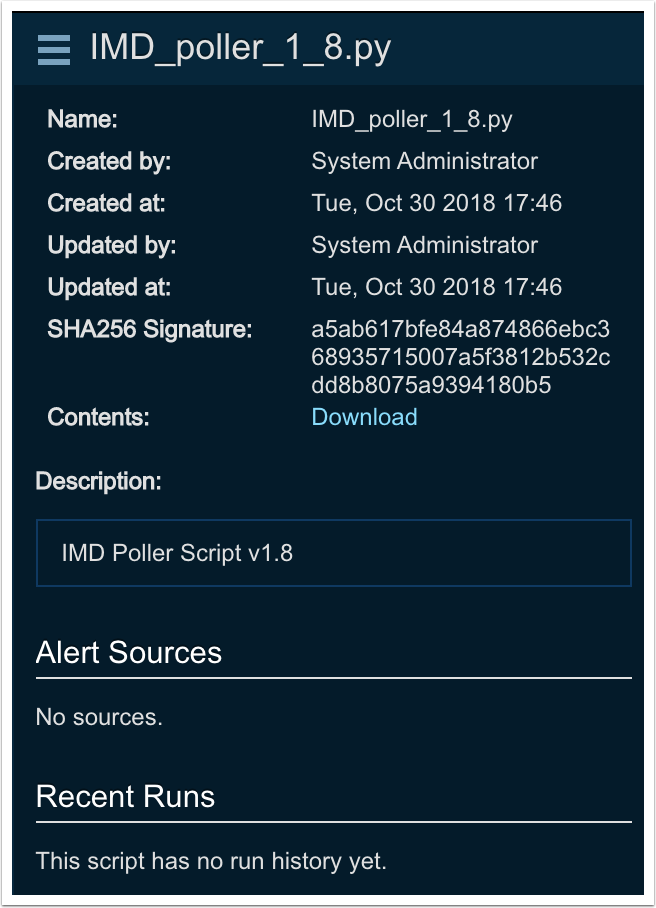
Once saved, the script information will be presented in the right-hand panel:
Creating the auth profile
The auth profile contains the username and password required to connect to the IMD service.
Note
Your professional services consultant will provide you with the username and password.
To create an auth profile:
-
Navigate to the
Scriptspage in Threat Response.
-
Select
Auth Profilesfrom the menu on the left.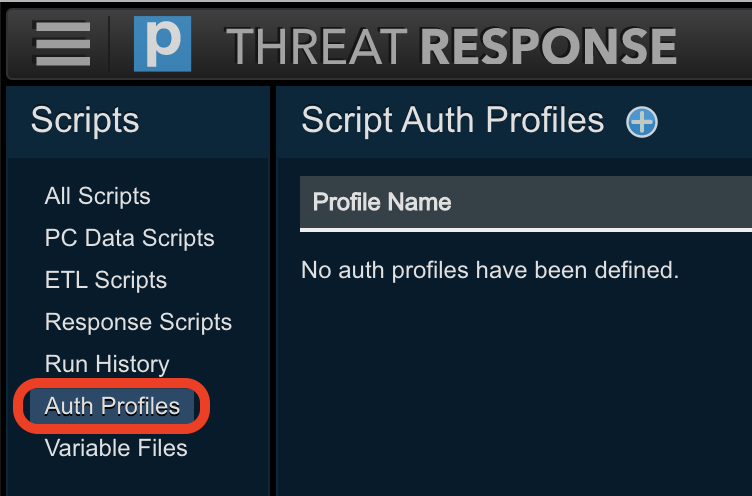
-
Click the
Add (+)button in the header section of the left panel to open theAdd Auth Profilepanel on the right. -
Give the auth profile a name (e.g. “IMD Auth”) and optional description, then click the
Add (+)button next to the “key/value” fields.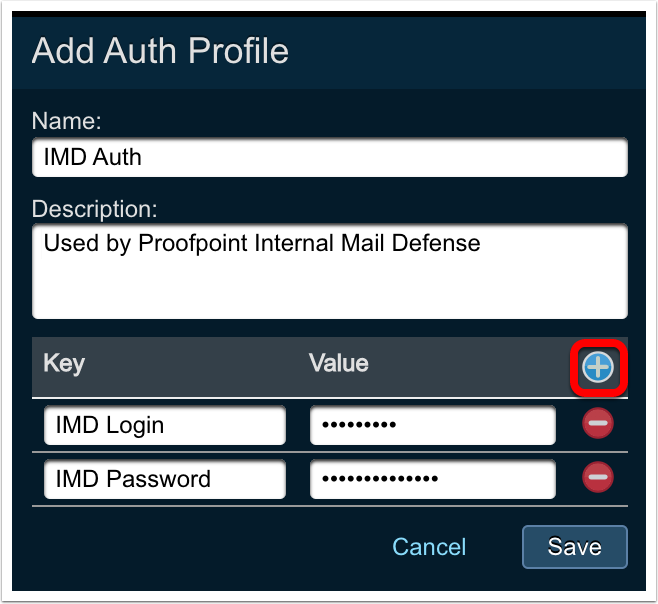
-
Enter “IMD Login” as the ‘Key’ and the provided login name as the ‘Value’.
-
Click the
Add (+)button to create a new key/value pair. -
Enter “IMD Password” as the ‘Key’ and the provided password name as the ‘Value’.
Note
The keys’ values will not be displayed as you type it. You can see them after saving by clicking the
Reveallink. -
-
Click
Save.
Customizing the JSON variable file
IMD requires certain defined variables to operate, and exposes a number of variables to customize your configuration. These variables are stored in a JSON-formatted text file that is uploaded to Threat Response.
Note
Your professional services consultant will provide you with a basic JSON file that will be need to be modified prior to uploading.
The basic variable file looks something like this:
{
  "IMD API Service" : "https://clusterid.pphosted.com:10000",
  "IMD Quarantine Folder List" : "Malware, Phish, Attachment Defense, Virus"
}
These two keys are required. “IMD API Service” should be modified to point to your specific IMD cluster and “IMD Quarantine Folder List” should be updated to included a comma-separated list of all the quarantine mailboxes configured in Threat Response. The folders listed above are the best practice recommendations.
If you use a proxy to communicate with the Internet, you will need to explictly state this in the json variable file.
A json variable file using a proxy looks something like this:
{
  "IMD API Service" : "https://clusterid.pphosted.com:10000",
  "IMD Quarantine Folder List" : "Malware, Phish, Attachment Defense, Virus",
  "IMD CertVerify" : "False",
  "IMD Proxy Enable" : "True",
  "IMD Proxy Scheme" : "http",
  "IMD Proxy Host" : "10.1.100.123",
  "IMD Proxy Port" : "8080",
  "IMD Proxy Auth Enable" : "True"
}
In some circumstances, it may be desired to safelist certain alerts so that they are not processed by Threat Response. This is done by creating a proofpoint_imd policy route to your IMD cluster which then bypasses Spam, Virus and Attachment Defense scanning.
Some common safelisted senders/recipients are: envelope sender of the Proofpoint email digest (if used) and the envelope sender AND recipient address of your Threat Response quarantine mailbox.
Important
Any alert matching one or more of the conditions of the proofpoint_imd policy route will not be ingested by Threat Response at all, and there will be no record of the corresponding message.
Uploading the JSON variable file
To upload the variable file:
-
Navigate to the
Scriptspage in Threat Response.
-
Select
Variable Filesfrom the menu on the left.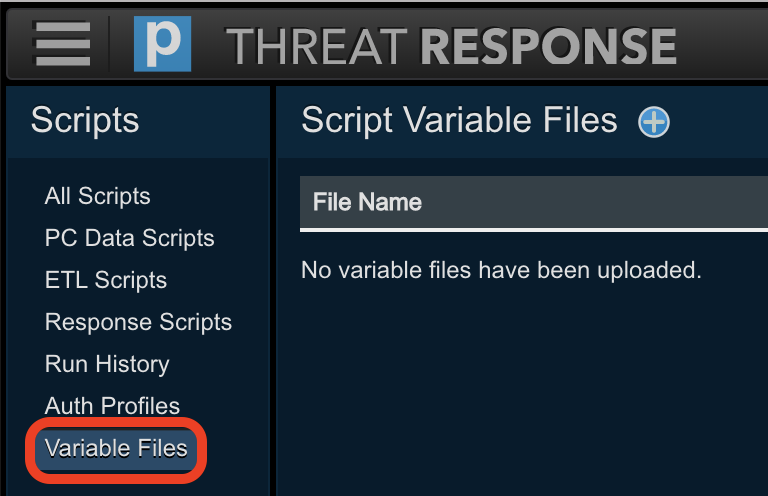
-
Click the
Add (+)button in the header section of the left panel to open theAdd Variable Filepanel on the right. -
Click
Choose fileand browse to the JSON file to upload. Enter an optional description.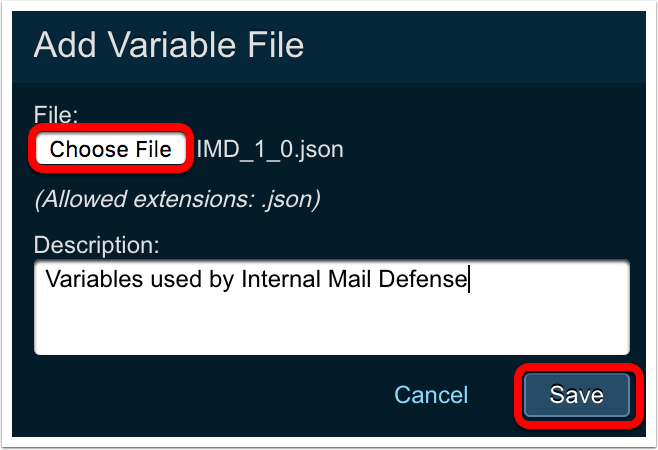
-
Click
Save.
Making changes to the JSON variable file
To make changes to the variables used by the IMD source, a new JSON file must be uploaded and linked. After making changes to the file, please follow the instructions in this guide to upload the new file and link it to the IMD source by updating the Variable File for the existing IMD source.
Adding the IMD source
-
Navigate to the
Sourcespage in Threat Response.
-
Click the blue
Add (+)button next to Sources in the left panel to add a new alert source to Threat Response. -
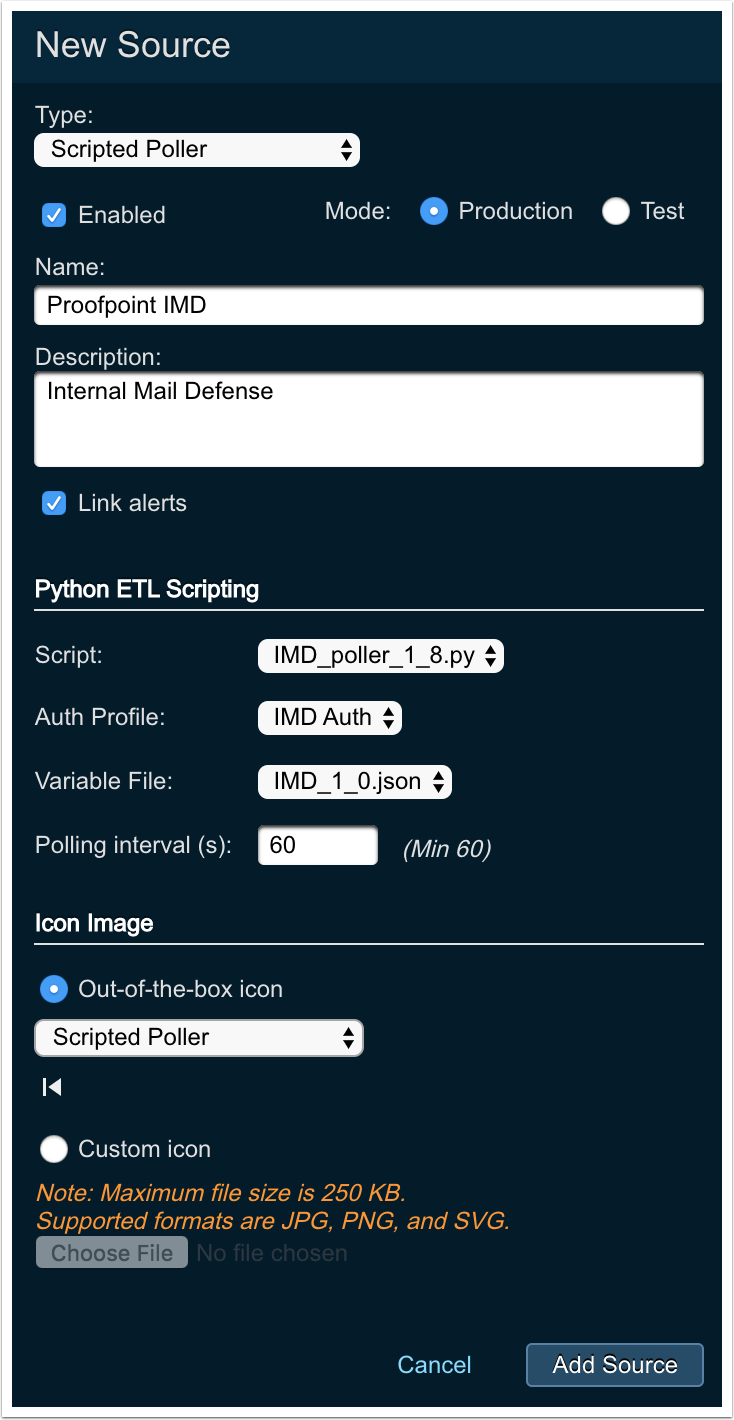
Select
Scripted Pollerfrom theTypedrop-down.-
Give the source a name, and optional description
-
Script: Choose the IMD script you uploaded earlier -
Auth Profile: Choose the auth profile you created earlier -
Variable File: Choose the JSON variable file you uploaded earlier -
Polling Interval: Set to 60 seconds (the minimum) -
Choose
Scripted Polleras theIcon Image
-
-
Click
Add Source
To link a variable file to an alert source:
Note
These steps assume the alert source has already been created. If it hasn’t, please follow the steps in Adding a source to create a new one. You can link the variable file during source creation.
-
Navigate to the
Sourcespage in Threat Response.
-
Select the alert source from the list, then click on
Editfrom the details menu.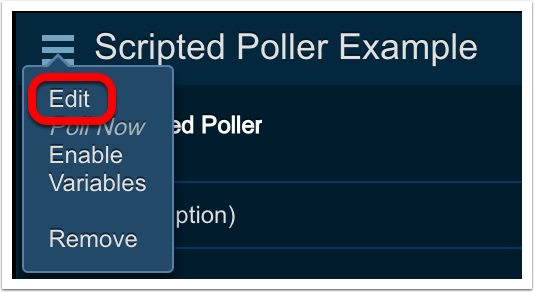
-
In the
Python ETL Scriptingsection of the details panel, choose the desired variable file from theVariable Filedrop-down.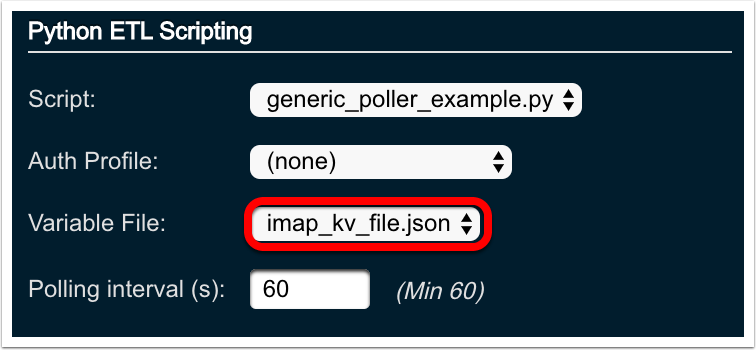
-
Click
Save Changes
Configuring Match Conditions
This section will cover the steps for creating, modifying and removing Match Conditions.
Creating Match Conditions
A Match Condition is a rule that allows Threat Response to take automated action based on certain criteria found in the reviewed alert.
-
To create a new Match Condition click the
Add(+)button to the right ofMatch Condition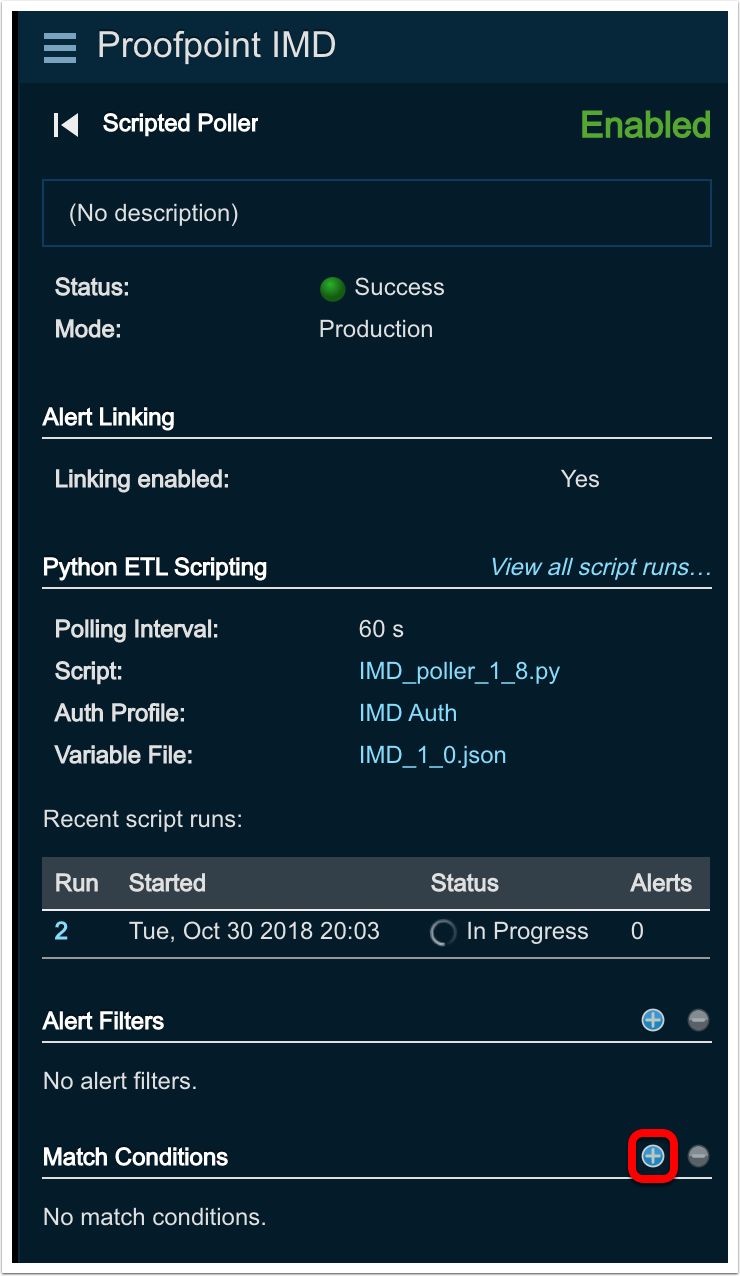
-
Within the ‘New Match Condition’ dialog configure the following:
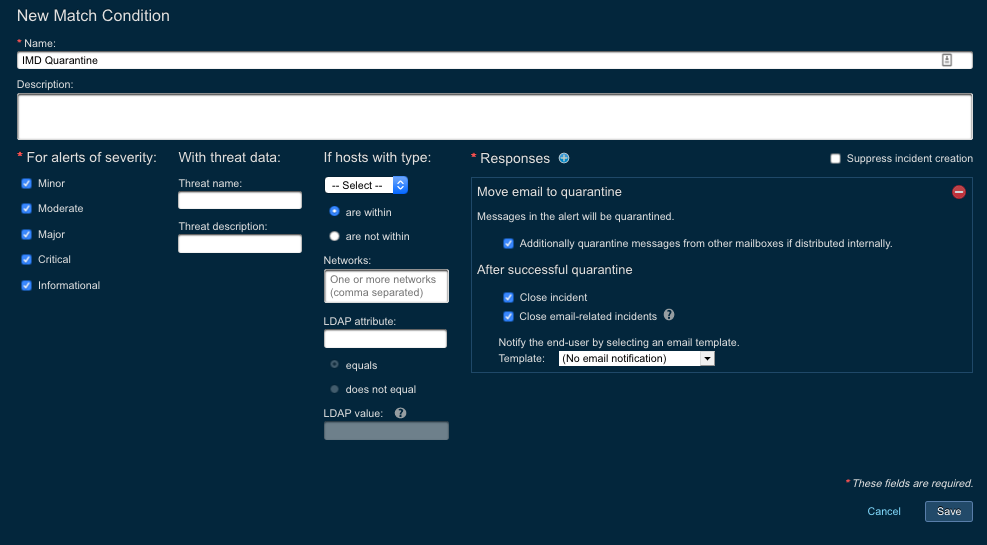
-
Name: Provide a name for the event source. This is an internal name only and can be whatever is most helpful to the administrator or operators. -
Description: Provide any desired description of the event source. -
For alerts of severity: Used to specify the severity of the alert to match. -
LDAP Attribute: Provides a dropdown list/text box to enter in an LDAP attribute. This is useful if you wish the match condition to only apply to a subset of users during testing, for example. In order for the alert to match on an LDAP attribute Threat Response must be configured to retrieve that attribute. To configure this collection please refer to the admin guide. The dropdown list will only populate with attributes collected. -
LDAP value: This test field is greyed out unless the LDAP attribute field is configured. It is required to be populated when active. -
Responses: This is the response action to take when the match condition criteria is met. Add a response toMove email to quarantineand choose toadditionally quarantine messages from other mailboxes if distributed internallyandclose incidentafter successful quarantine.
-
-
Click
Save.
Changing Match Conditions
-
Select the appropriate Alert Source
-
In the right hand pane identify the Match Condition to change
-
Click ‘Change’ in the bottom right corner of the Match Condition

-
Make appropriate adjustments and save the Match Condition. Reference “Creating Match Conditions” in this document for specifics about each configurable setting.
Disabling Match Conditions
-
Select the appropriate Alert Source
-
In the right hand pane identify the Match Condition to disable
-
Click ‘Disable’ in the bottom right corner of the Match Condition

-
The selection in the bottom right corner should change to ‘Enable’

Enabling Match Conditions
-
Select the appropriate Alert Source
-
In the right hand pane identify the Match Condition to enable
-
Click ‘Enable’ in the bottom right corner of the Match Condition

-
The selection in the bottom right corner should change to ‘Disable’

Remove Match Conditions
Important
There is no warning given to verify and there is no way to undo this action.
-
Select the appropriate Alert Source
-
In the right hand pane identify the Match Condition to remove
-
Click checkbox to the left of the Match Condition to remove
-
Click the red circle indicator that becomes active opposite the ‘Match Condition’ heading
