Threat Response - Clustering Guide (New)
The Proofpoint Threat Response platform for 5.0 and beyond can be configured and deployed as a high-availability (HA), or failover cluster. Thus, incident responders can configure the platform in such a way that any downtime is significantly reduced.
The high-availability configuration follows a master/standby mode, whereby each server functions as a standalone system and shares a management IP address. This provides a seamless experience for the end users of the platform. If the server, currently tasked with the master role, becomes unreachable, the user is transferred to the standby server. Consequently, the standby server assumes the master role. When the previous master server is online again, it assumes the standby role.
Configuration Requirements
- Threat Response servers that are to be members of the cluster should reside on the same subnet.
- The cluster management IP address should reside on the same subnet as the Threat Response servers.
- Threat Response requires network communication on certain ports between the cluster members to ensure that the database can be replicated. These ports are listed in the table under Required Ports for Network Communication in the Installation Guide.
- Credentials for individual servers should be configured and recorded properly.
- All of the cluster members should be configured individually for the remote authentication source if account authentication is to be configured to “remote.” This prevents failed login attempts in the event that a member server without this configuration assumes the master server role.
Setup Instructions
To bind two nodes into a cluster, follow these instructions. (Note that nodes 1 and 2 must be on the same version.)
First, navigate to High Availability under Maintenance in the Appliance Management Console.to configure a primary and a secondary node.
| Step # | Node 1 (Primary) | Node 2 (Secondary) |
|---|---|---|
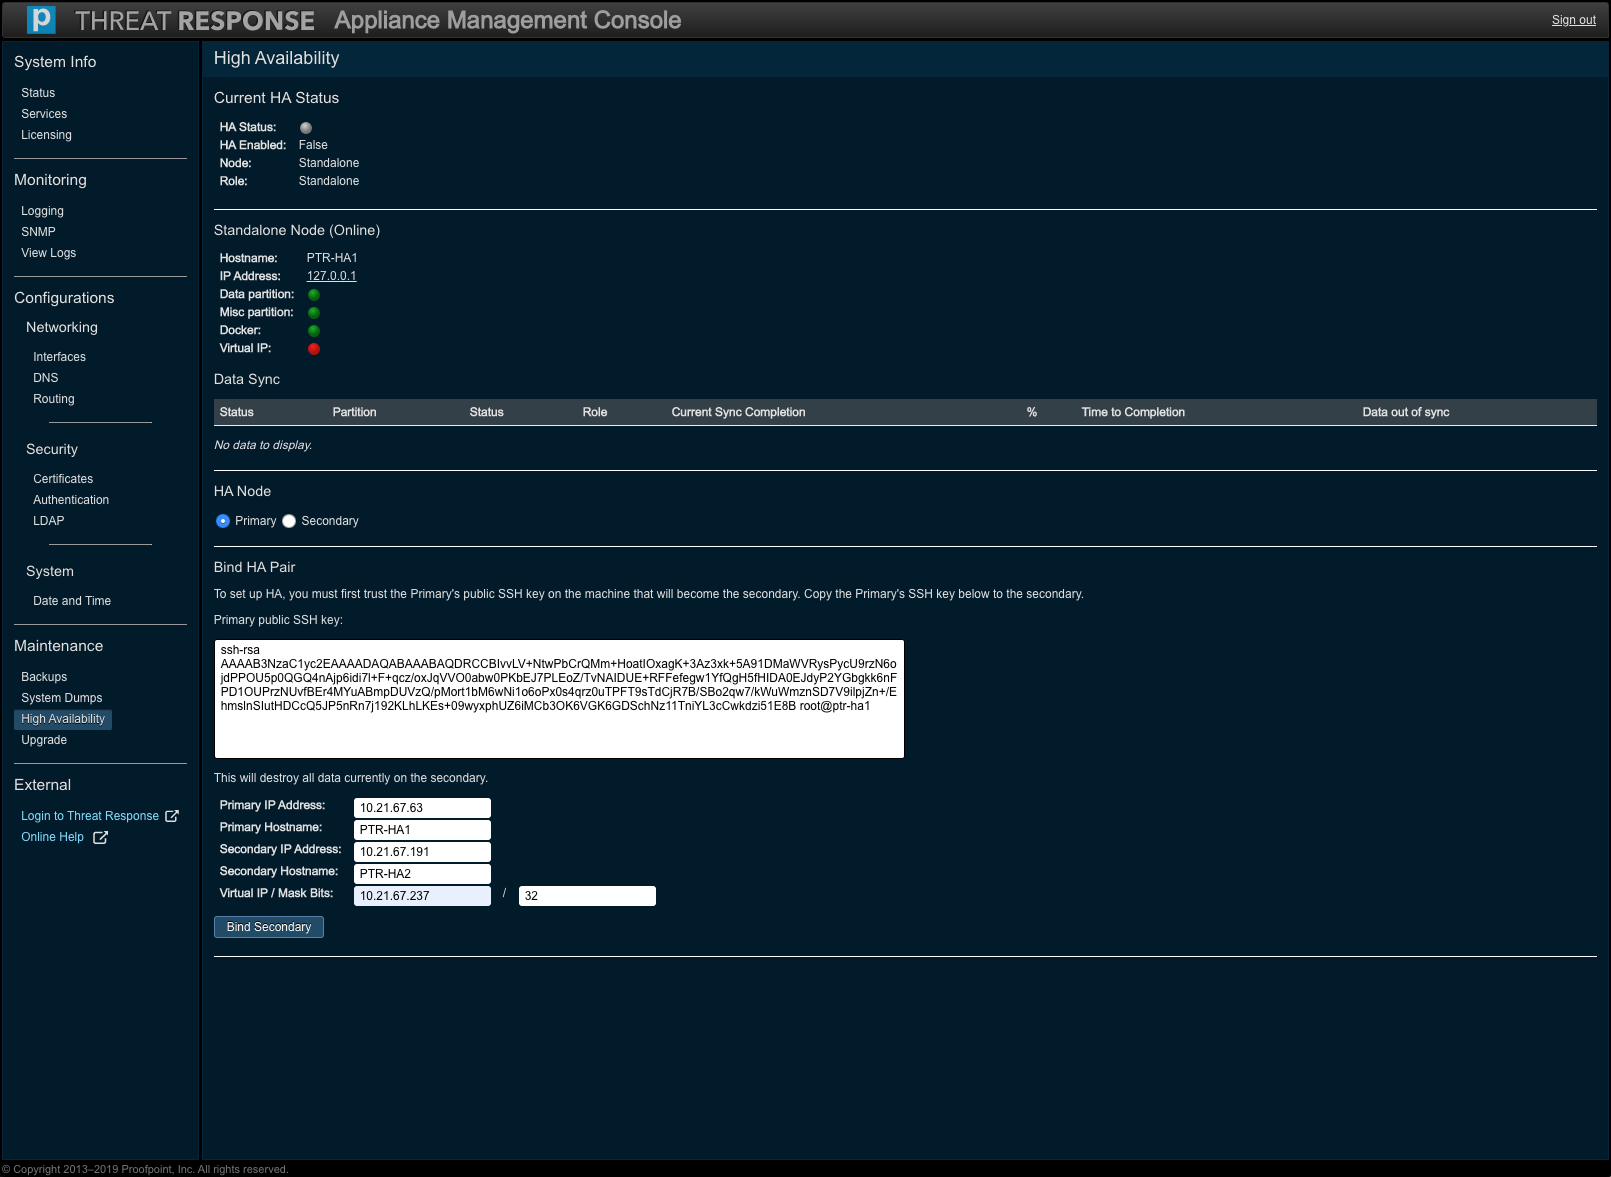
| 1 | Choose “Primary” under HA Role. (This selection yields Bind HA Pair.) | |
| 2 | Copy the “Primary” SSH key text. | |
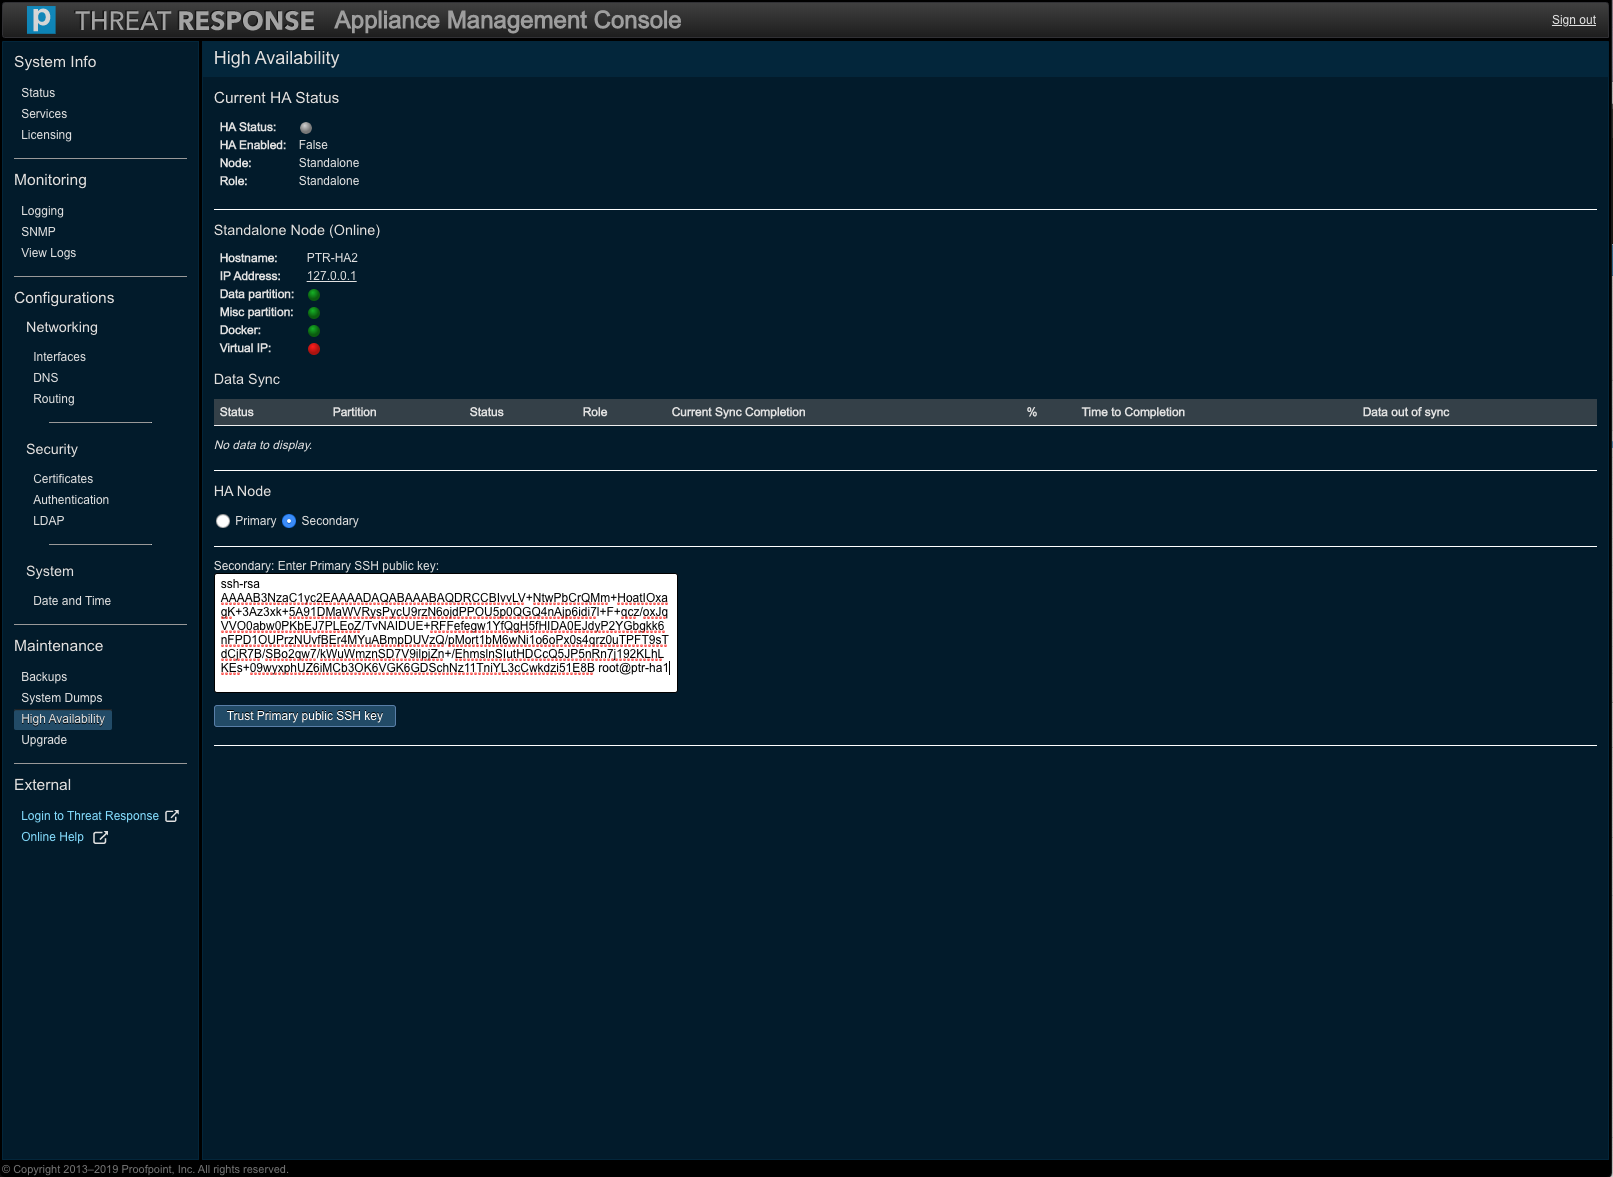
| 3 | Choose “Secondary” under HA Role. | |
| 4 | Paste the “Primary” SSH key text into the text box. | |
| 5 | Press the Trust Primary Public SSH Key button to synchronize the data. | |
| 6 | Fill in the following information: Primary IP Address, Primary Hostname, Secondary IP Address, Secondary Hostname, and Virtual IP / Mask Bits. | |
| 7 | Click on Bind Secondary. |
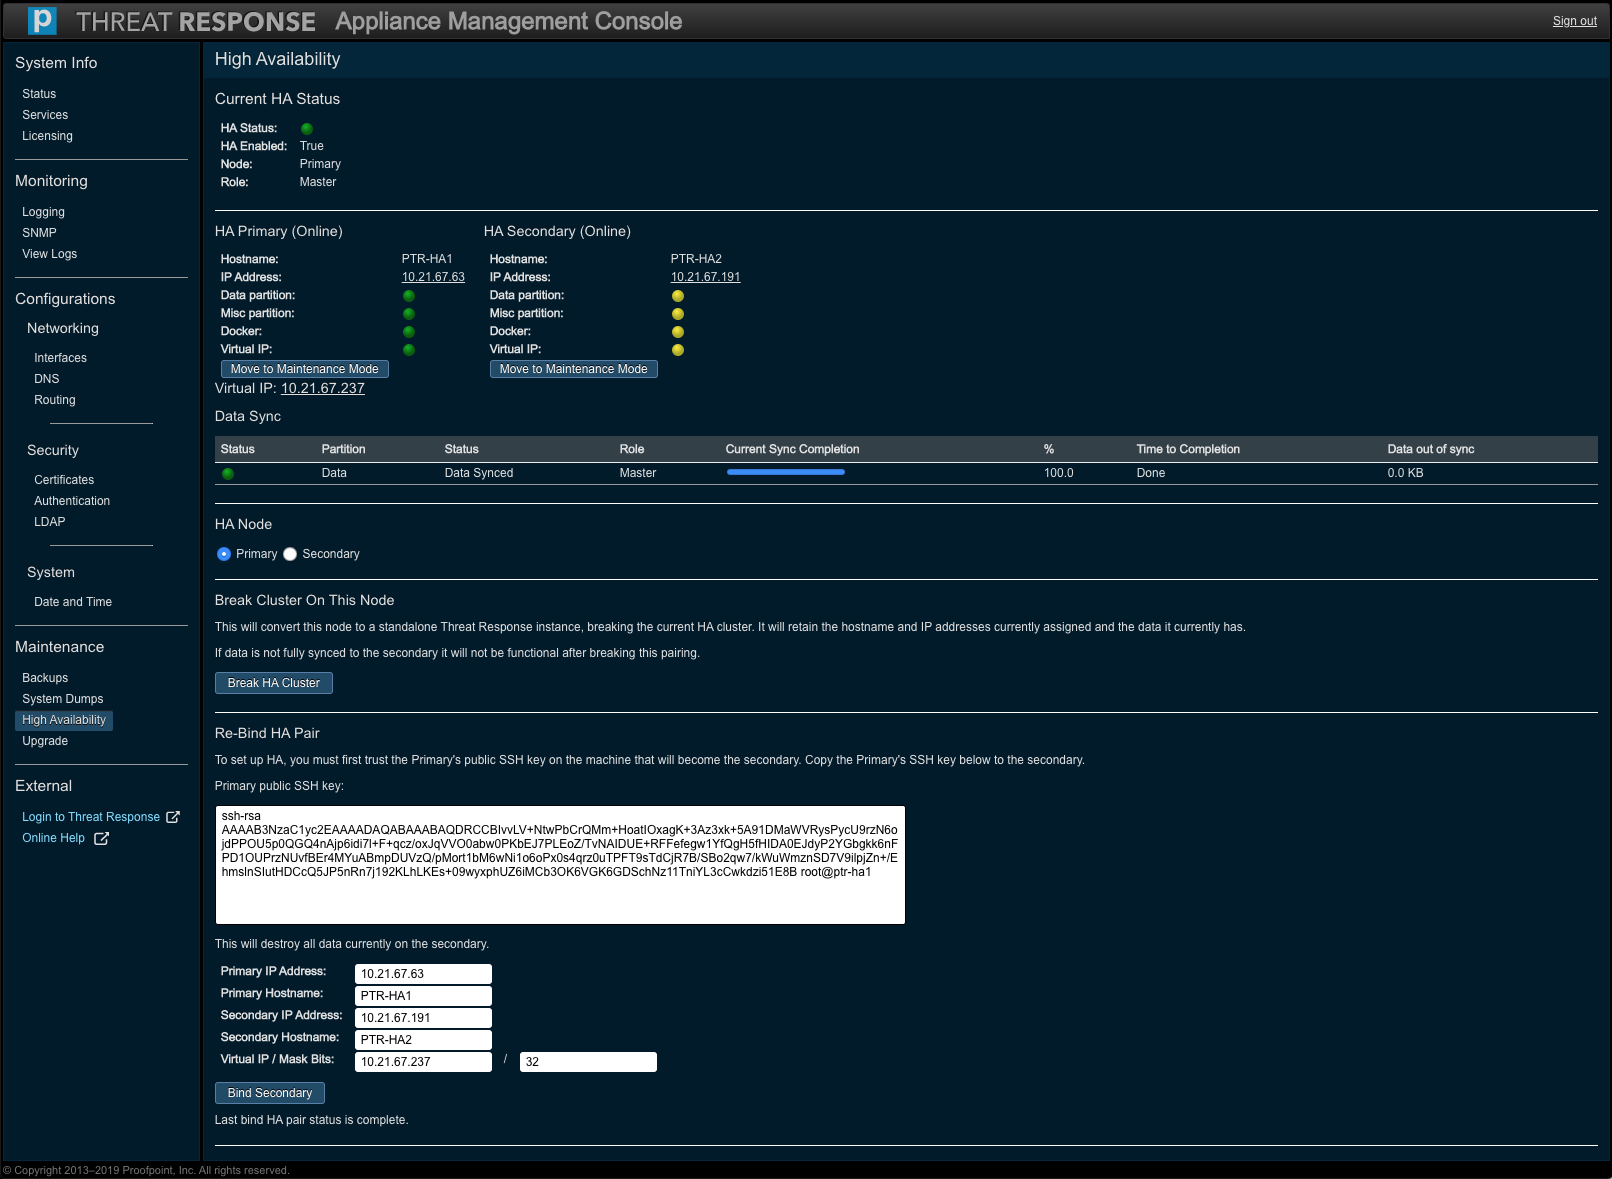
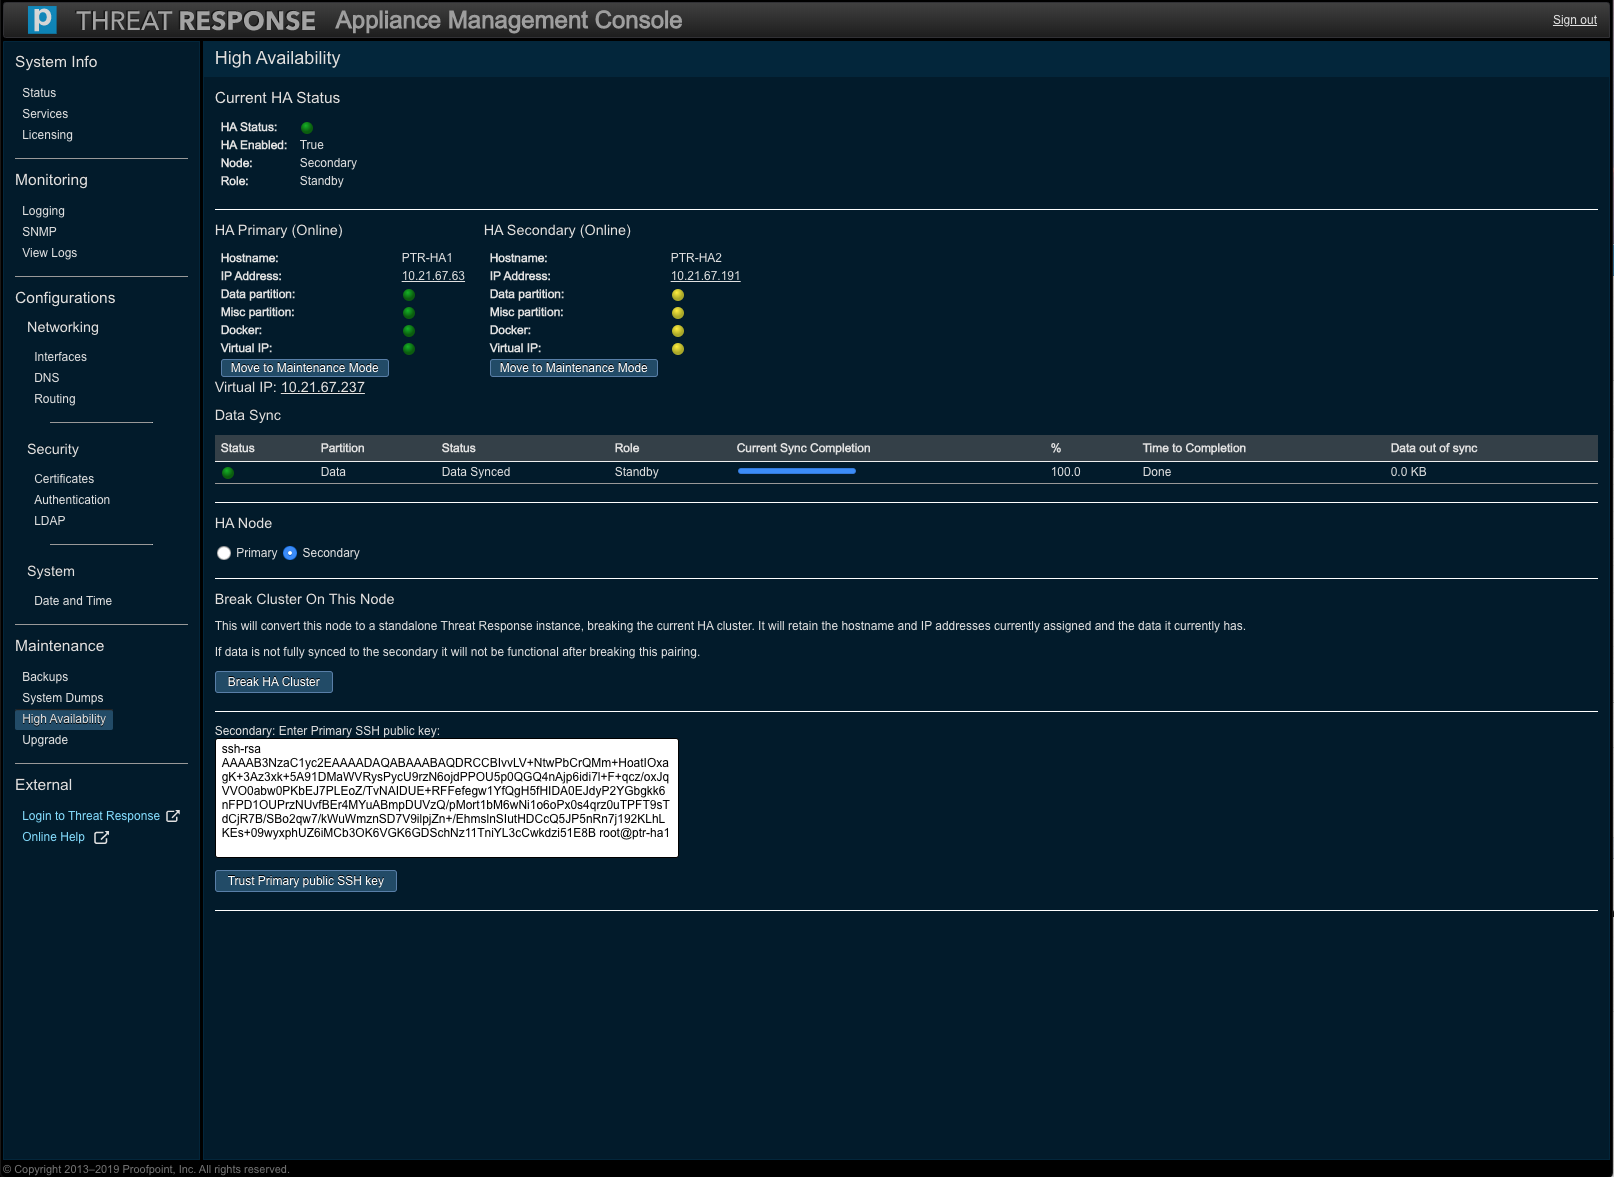
Both the HA roles are depicted in the following screenshots.


Once these steps are completed, the cluster begins replicating the data between the disks on both nodes. This operation can take a few hours to complete depending on the size of the disk and the amount of data to be synchronized. Note that the Data Sync table on the High Availability page displays the status of the operation, the amount of data to be synchronized, and the estimated time to completion.
Importantly, the cluster is not ready until the operation is complete. We strongly recommend that the nodes remain untouched during the operation. Any interference may slow the replication, and result in inconsistent data across the nodes.
Once the operation completes and the status is at 100%, the cluster is ready.
Note
When a cluster is set up, the PTR/TRAP instance must be accessed using the Virtual IP address (configured in Step 6 above).


Upgrading a Cluster
Given a functional high availability (HA) cluster of two nodes in place, verify that the data is synchronized at 100 percent. Let the primary node be designated as appliance A and the secondary node as appliance B.
- Proceed to the High Availability section of appliance B.
- Click on Move to Maintenance Mode.
- Once the node is in Maintenance Mode, navigate to the Upgrade section (of appliance B).
- Upgrade appliance B by following the upgrade steps and then reboot the appliance when the upgrade is complete.
- Navigate to System Status on appliance B. Wait until the system displays as “ready.”
- Proceed to the Upgrade section of appliance A and then perform the upgrade operation.
- Navigate to System Status after you have rebooted appliance A. Wait until the system displays as “ready”. The system should be ready for use at this time.
- (Given that both the appliances are upgraded), navigate to either appliance A’s or appliance B’s High Availability section and then click on Bring Node Online. The secondary node should now be online. Consequently, it will join the cluster and the pending data sync will follow (on the upgraded appliances).