Threat Response - Console Guide (New)
New and Improved Threat Response Management Console Version 5.0 and Beyond
The “new and improved” version of the appliance management console simply updates the core system by providing the following elements.
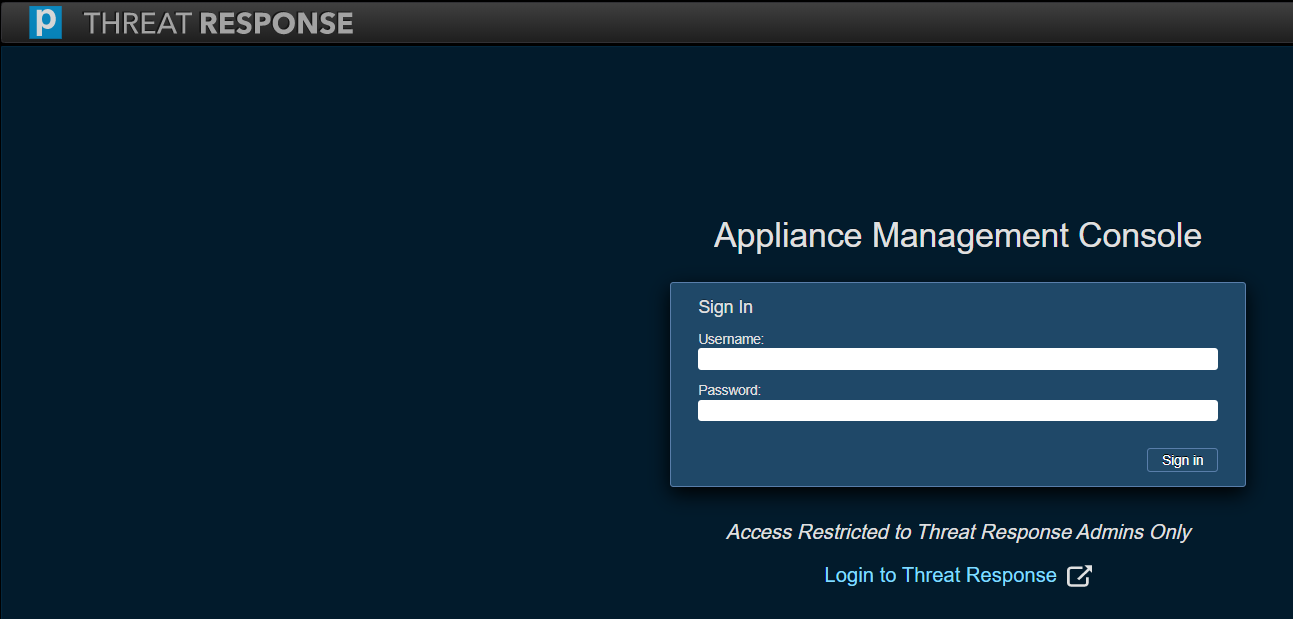
Appliance Management Console Login
Use this login to access the Threat Response Appliance Management Console after you have put in the following Web address.
https://Your IP Address:8080
System Info
System Status
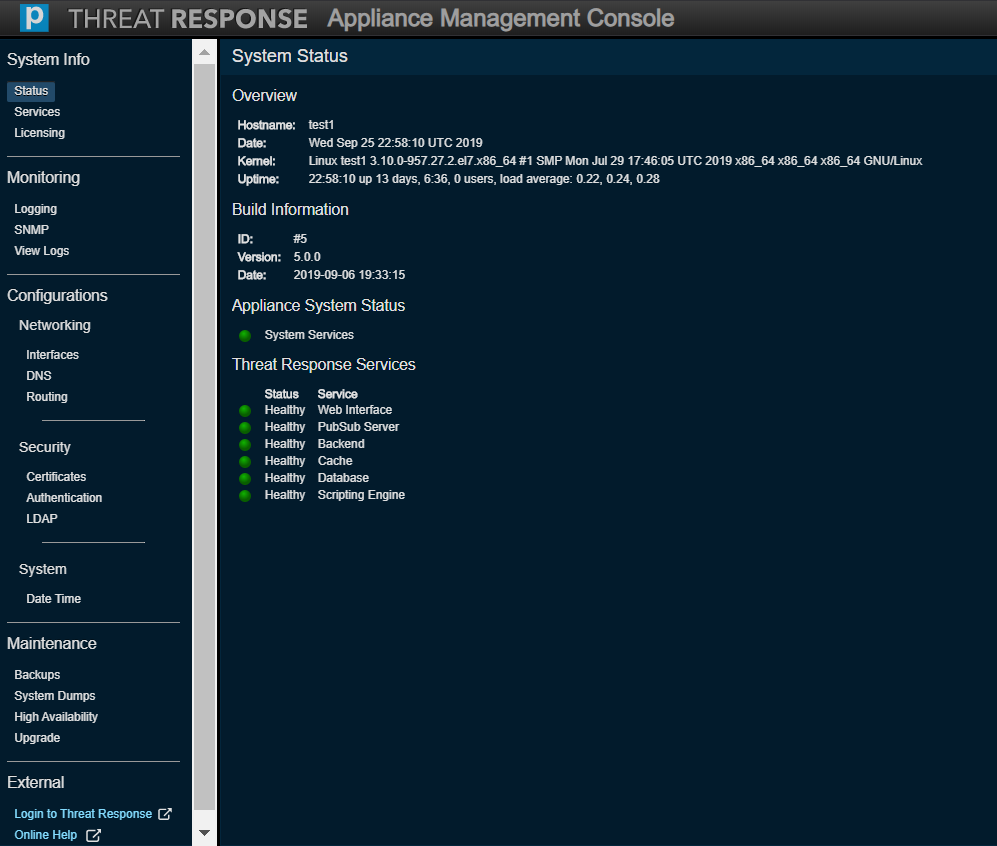
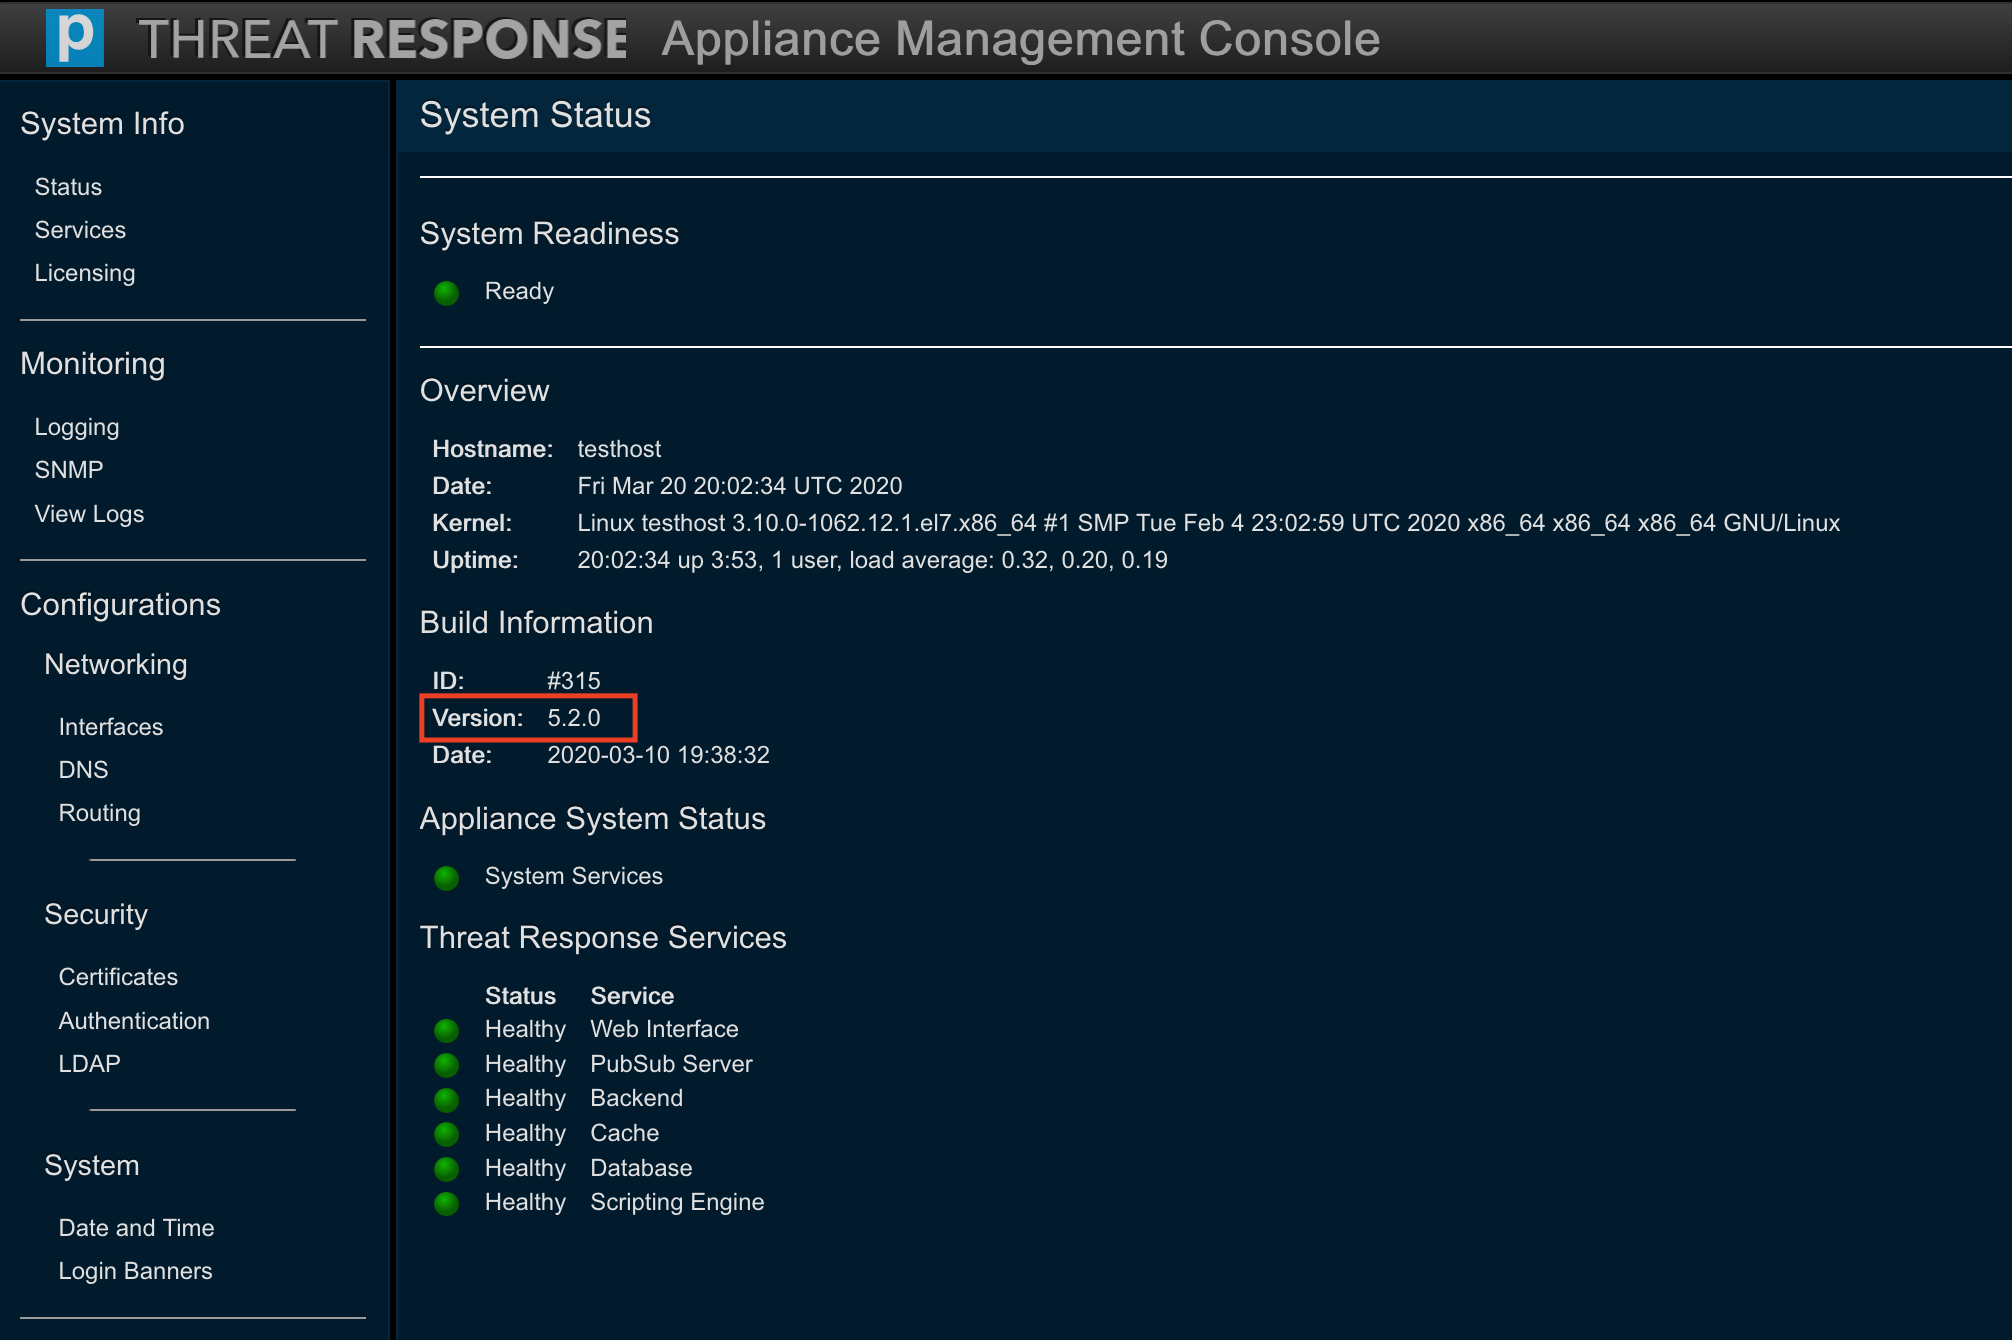
“Status” discloses all the facts of the PTR/TRAP system, including
- an overview (hostname, system date, kernel, uptime),
- build information (ID, version, date),
- appliance system status (system services), and
- the status of the Threat Response Services.
Tip
The kernel field identifies an underlying platform as either CentOS or Amazon Linux, thus determining whether the PTR/TRAP application is running inside a VMware environment or inside an Amazon Web Services (AWS) environment.
The colored indicator alongside a service denotes the health of that service.
 Green: a desirable state.
 Yellow: the state of starting or stopping.
 Red: a failed state.
 Gray: an inactive or stalled state.
Services
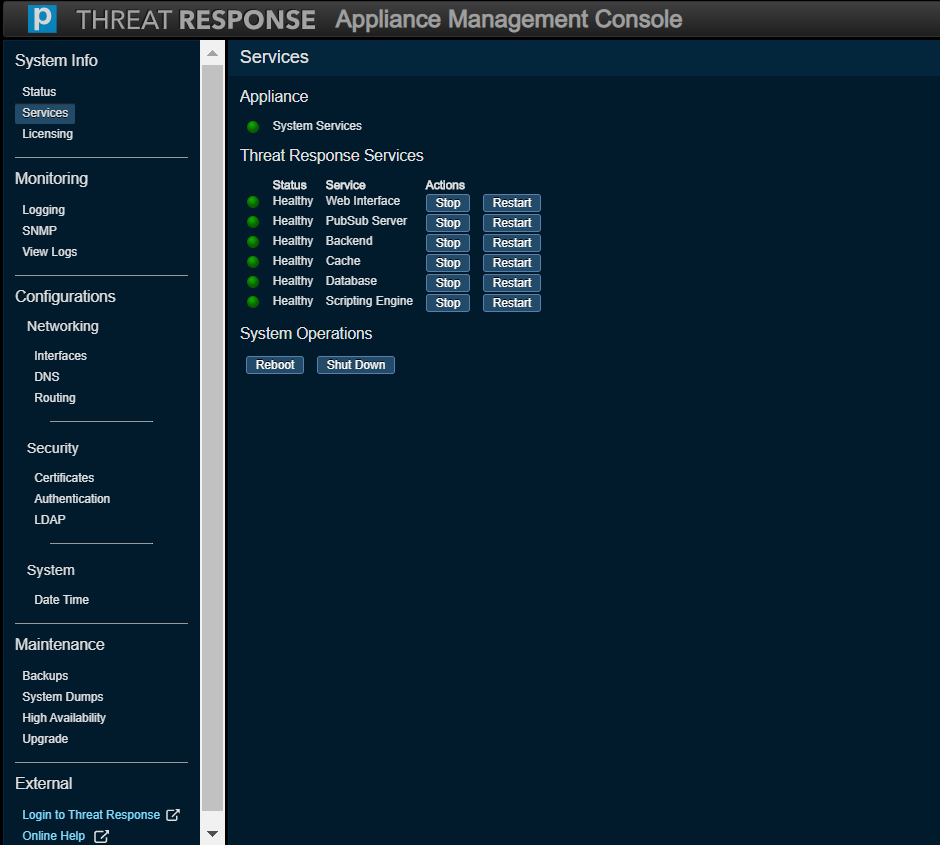
Services enables you to act on your system’s services. In other words, you can either start, stop, or restart any of the listed services.
This page also allows your system to be either rebooted or shut down.
Licensing
Licensing lets you register a new license, remove a license, and view any installed licenses.
Any new licenses need to be validated with Proofpoint before using PTR/TRAP 5.0. The system will connect to Overcast, a Proofpoint-owned cloud service, in order to validate these licenses.
If necessary, connectivity to Overcast can be established via HTTPS proxy server in the network. Be sure to check the Use Proxy option to specify a proxy server hostname or an IP address and a port. If the proxy server requires authentication, check the Auth required option to specify a username and password.
Note
The proxy server specified here is only used for license validation. It is not used for any other inbound/outbound network communication on the PTR/TRAP instance. It is also unrelated to the proxy server configured under System Settings in PTR/TRAP.
Enter your license key to register a license as depicted in the screenshot directly below, then press Register to trigger a validation request.
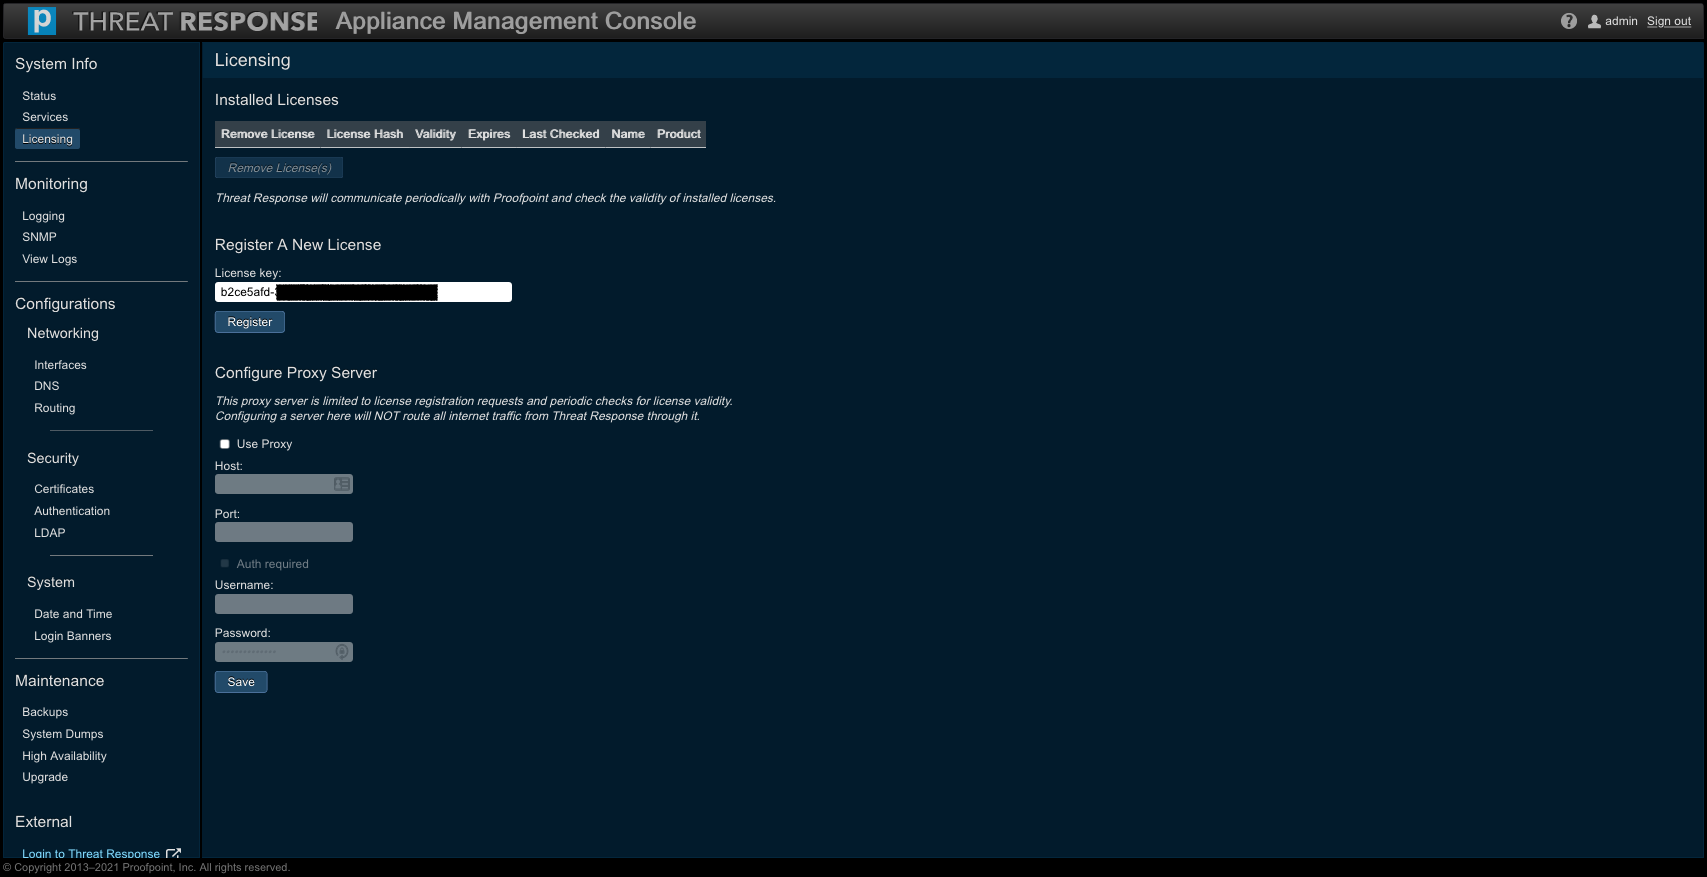
The successfully validated licenses will be applied and displayed under Installed Licenses. Note that each validated license associated with an instance of PTR/TRAP will be accompanied with both a name and an expiration date.
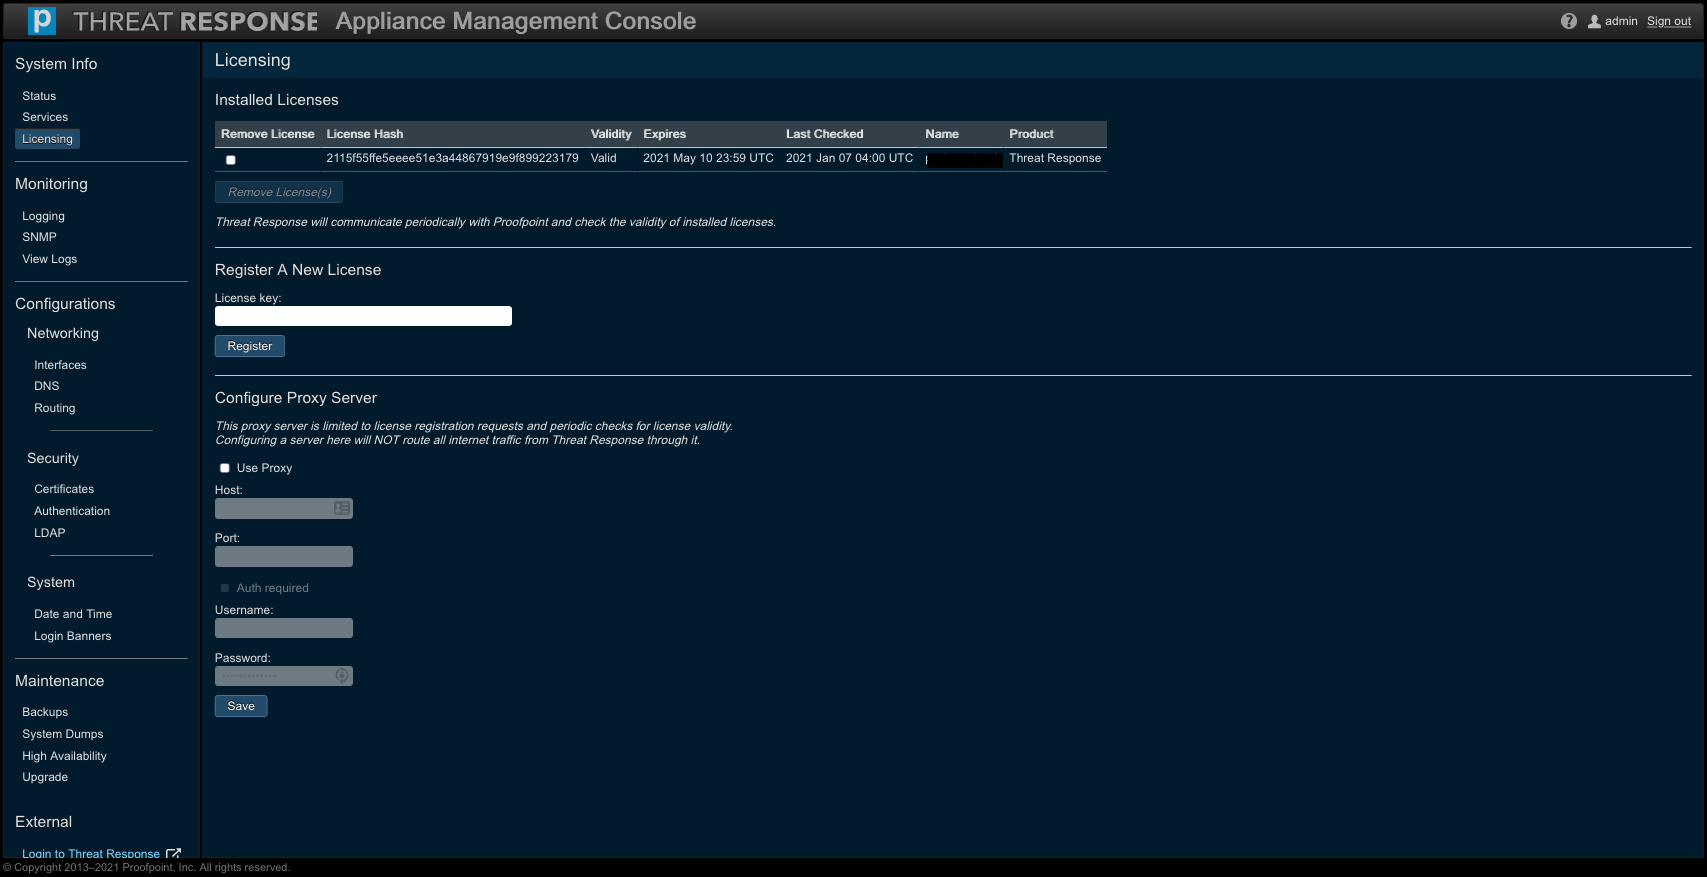
Further, when the expiration of your license nears and you submit a renewal request, Proofpoint will extend the expiration date on that license. The appliance will automatically perform a validation check (via any proxy server) and reflect the updated expiration date on the renewed license to make sure it is still valid.
Note
It is necessary that Overcast connectivity via any proxy server be maintained on the appliance so that PTR/TRAP will reflect the renewed state of the license over time.
- On versions 5.4 and beyond, this periodic validation check is performed on an hourly basis.
- On older 5.x versions, this periodic validation check is performed on a daily basis.
Tip
The same license key can be applied to a PTR/TRAP instance running inside a VMware or an AWS environment.
Monitoring
Logging
Use this option to monitor or modify current logging settings for the files seen in the View Logs tab as well as for those files used during a System Dump from the Monitoring tab. Use the option in the Local Log Filtering section to select a minimum level of severity. The debug level captures the most data. While this is useful for troubleshooting, be aware that the log files will grow much faster. The levels are listed below with the highest level of severity coming before all others.
- None
- Emergency
- Alert
- Critical
- Error
- Warning
- Notice
- Info
- Debug
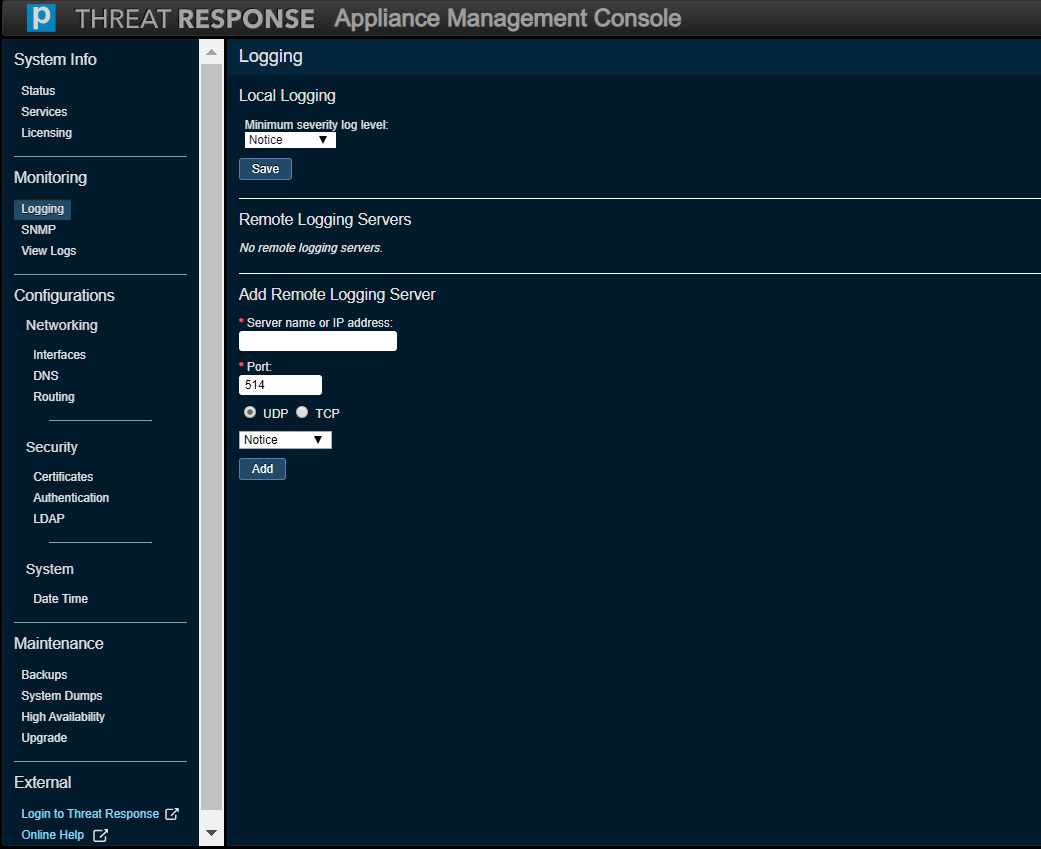
SNMP
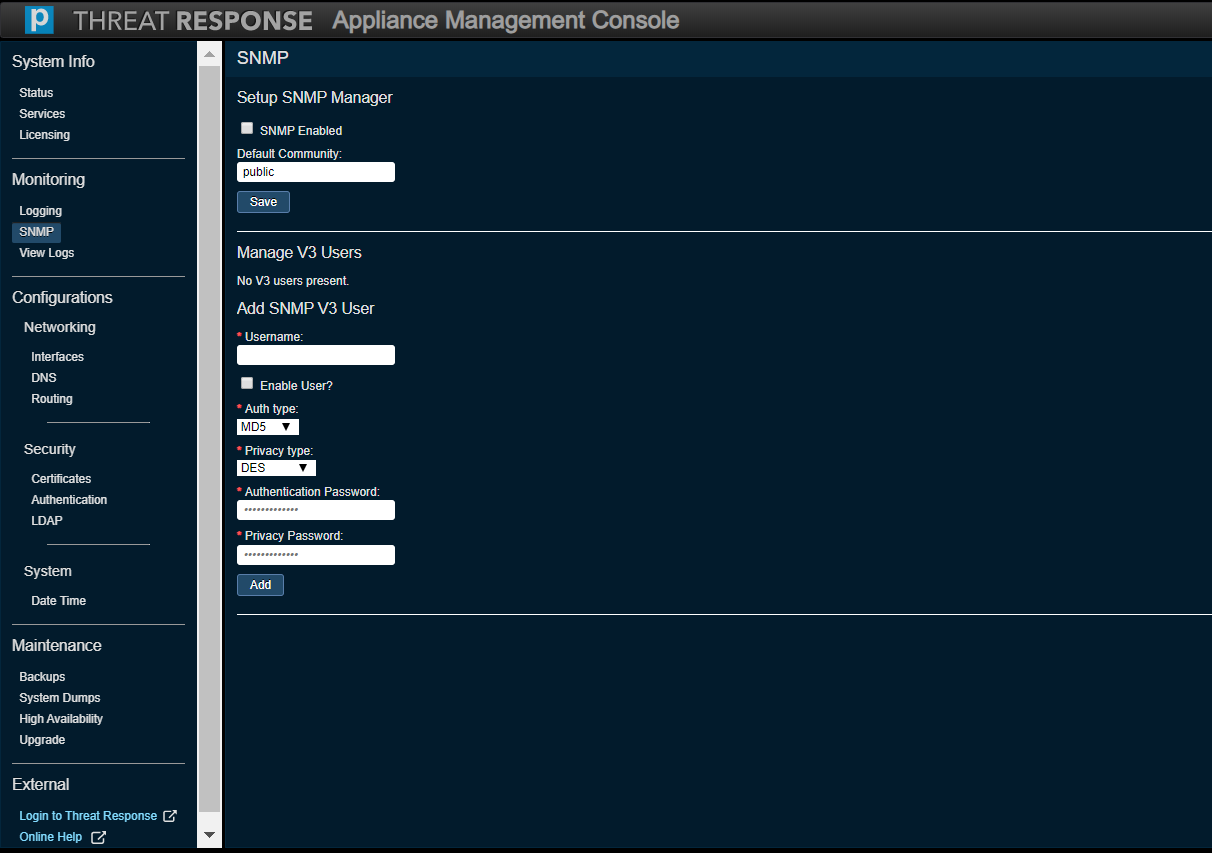
Use this option to monitor or modify current SNMP settings, which are used to monitor statistics.
View Logs
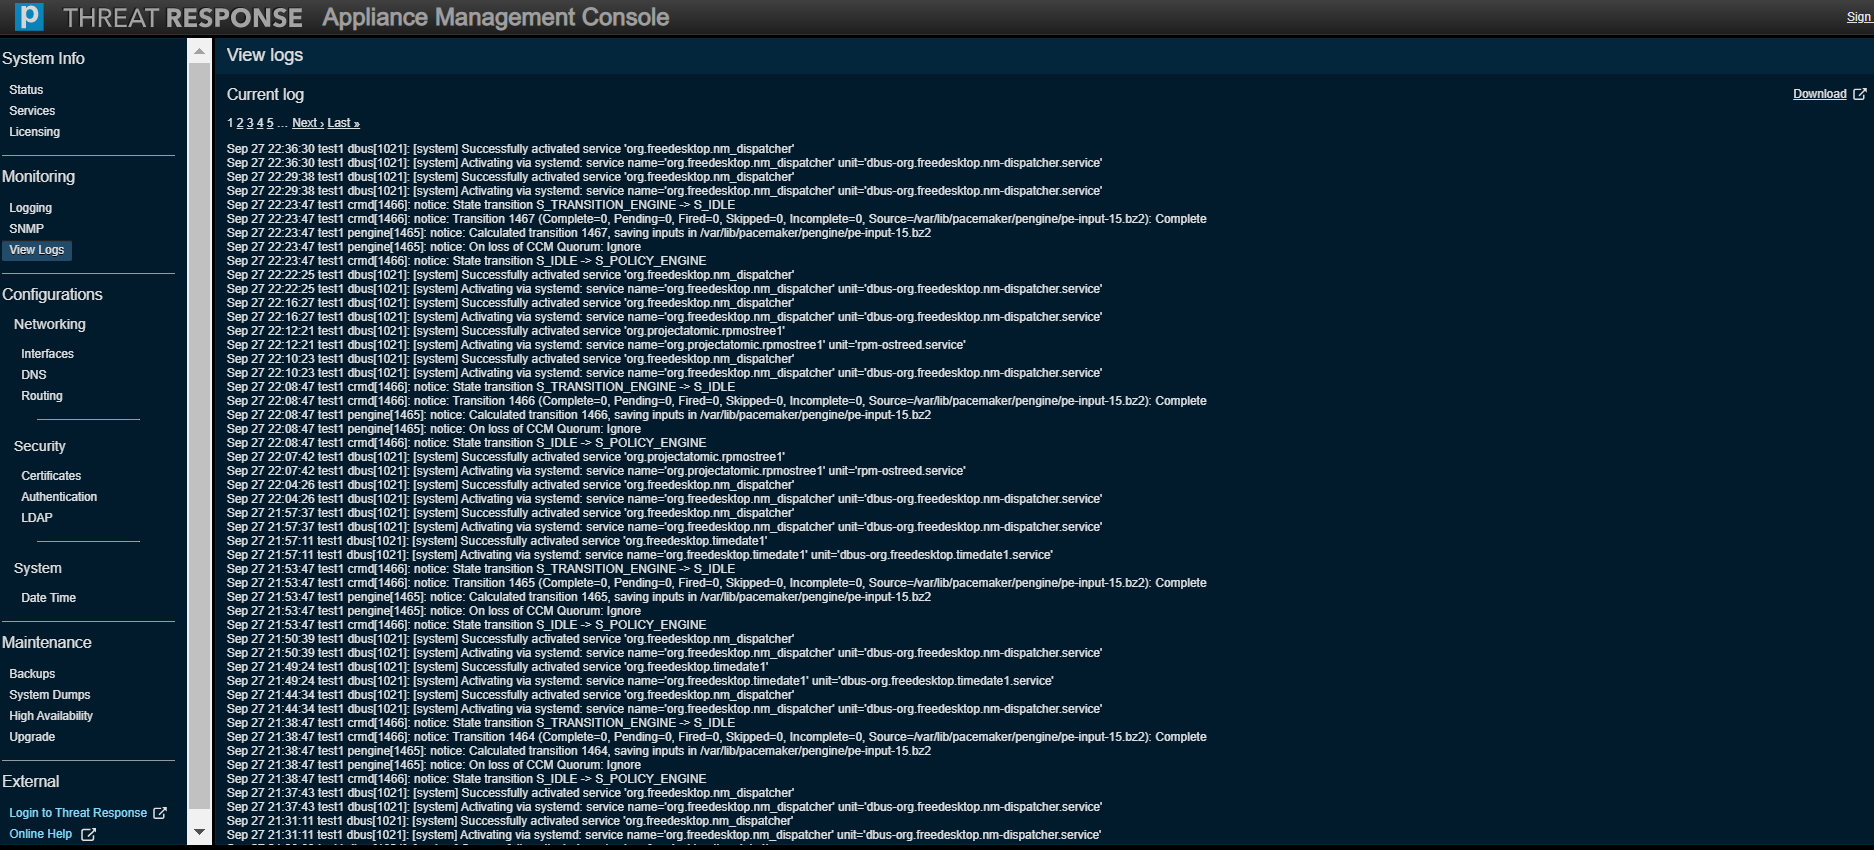
Use this option to monitor logs.
Configurations
Networking (Interfaces)
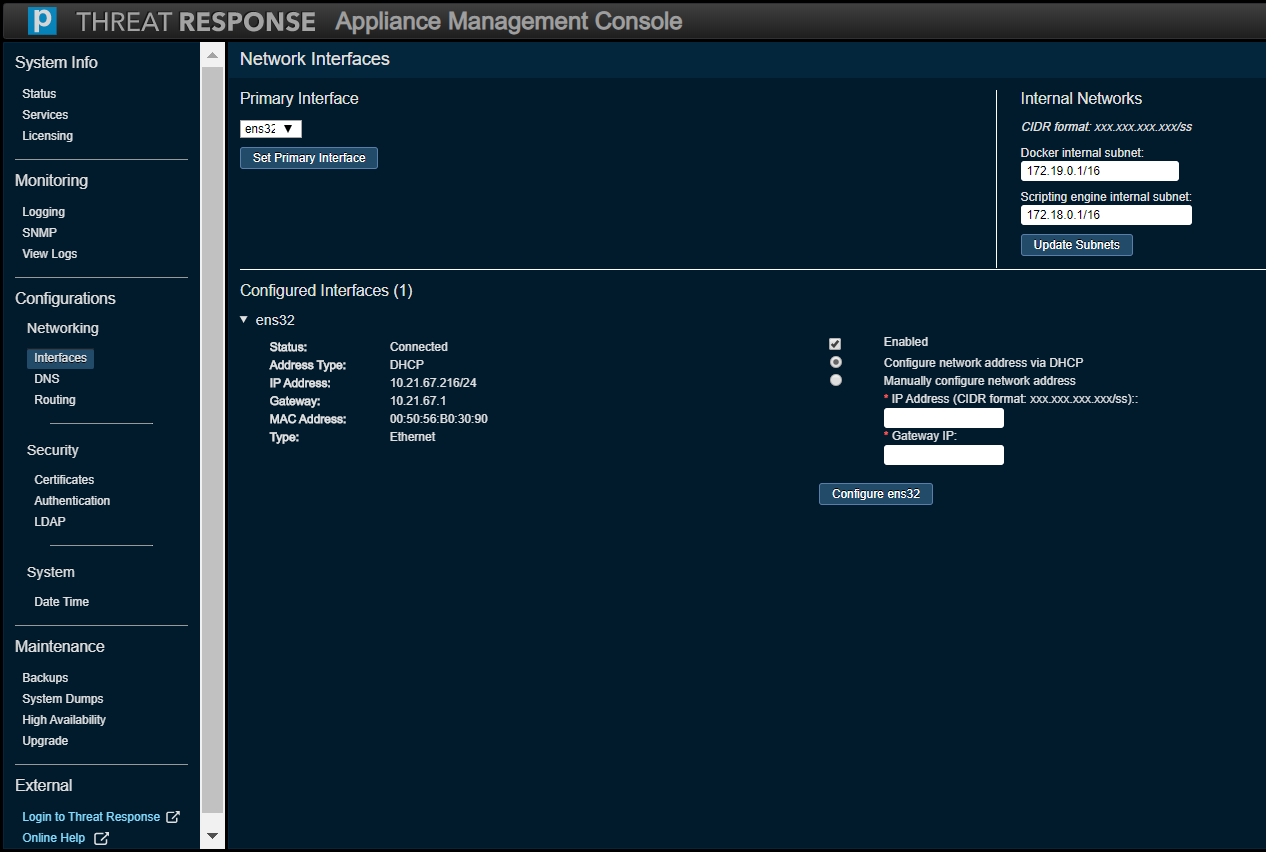
Use this option to monitor or modify settings for any of the configured network intefaces on the Virtual Machine.
The Internal Networks section addresses the problem of subnet system incompatibility by offering a solution, namely, an option to change the pair of subnet identifiers in the event that the appliance’s two internal subnets (docker and scripting engine) conflict with your network. These two entries must be specified in the format of Gateway IP address / subnet mask bits.
Note
The Network Interfaces screen is only applicable to a PTR/TRAP instance running on VMware, and not to an instance running in an Amazon Web Services (AWS) environment.
Networking (DNS)
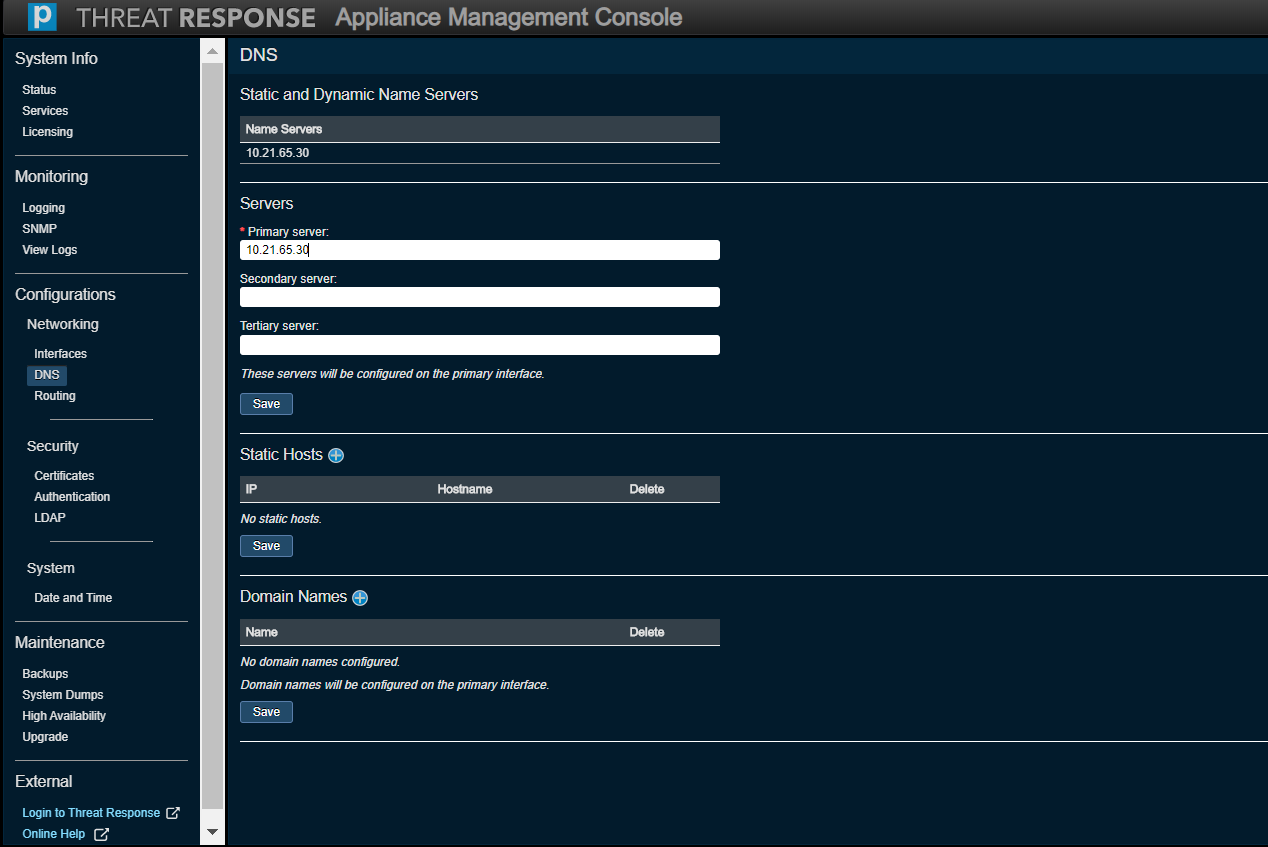
Use this option to monitor or modify current DNS settings.
Note
There is no restriction on the number of domain names that can be added to the new console; the old console limited users to six.
Networking (Routing)
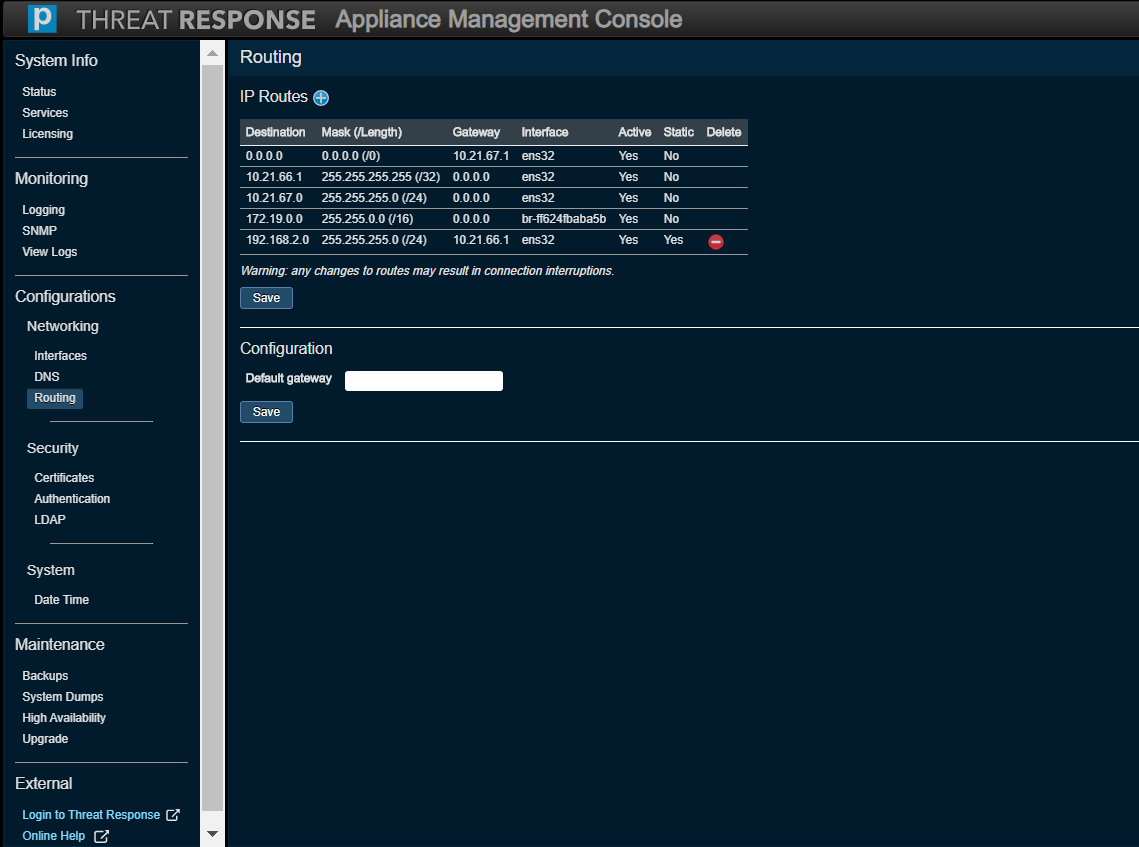
Use this option to modify an IP routing configuration. Note that you can only remove static routes that have been manually added.
Note
The Default Gateway text box (on the Routing page of the new Appliance Management Console) should not be addressed in any way.
Security (Authentication)
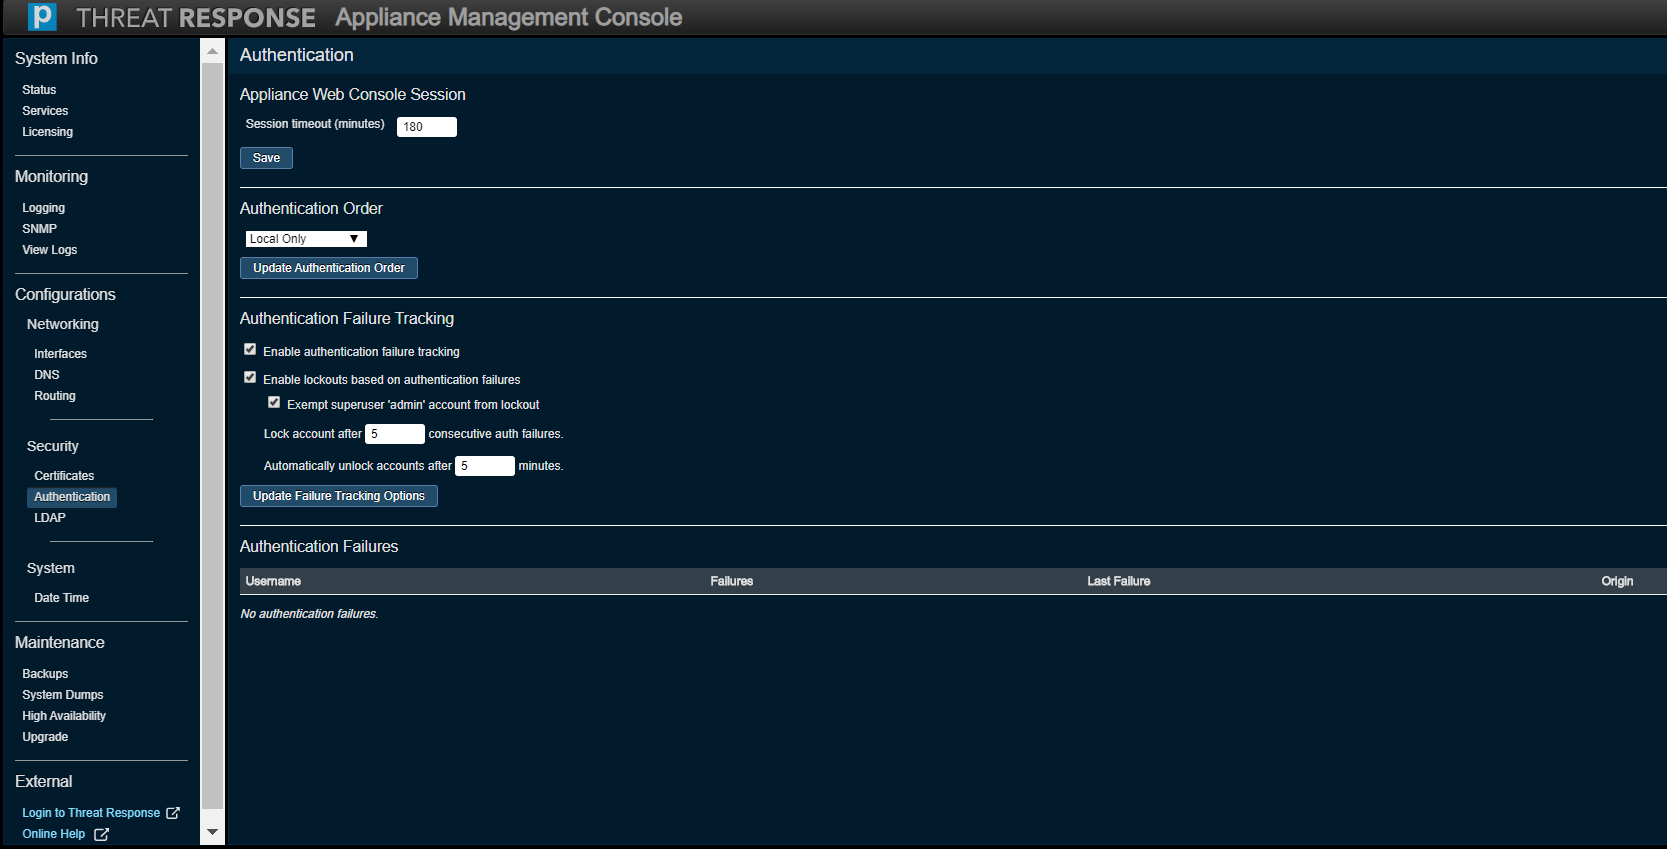
Authentication to Threat Response can be set up to use credentials configured in the database or via the Lightweight Directory Access Protocol (LDAP) server. If the credentials match, and the authenticated entity is authorized to use the system, then the process is complete (and the user is granted access). A login failure occurs only if both methods fail.
Note
At present, there is no support for non-ASCII usernames.
The Authentication Order can be set to one of the following items and saved by clicking on Update Authentication Order.
- Local Only
- LDAP Then Local
- Local Then LDAP
The Appliance Web Console Session section is used to specify the maximum length of time after which a user’s session on the Appliance Management Console times out due to inactivity. This can be set to a maximum value of 180 minutes.
The SSH Access section allows you to choose whether or not password-based SSH logins are enabled or if only key-based logins are allowed.
The Authentication Failure Tracking section offers several ways of managing such events, namely by
- enabling authentication failure tracking,
- enabling lockouts based on authentication failures,
- exempting the superuser, or admin, account from a lockout,
- locking an account after X number of consecutive auth failures (1 to 100), and
- automatically unlocking accounts after X number of minutes (5 to 120).
Press Update Failure Tracking Options to confirm your selection.
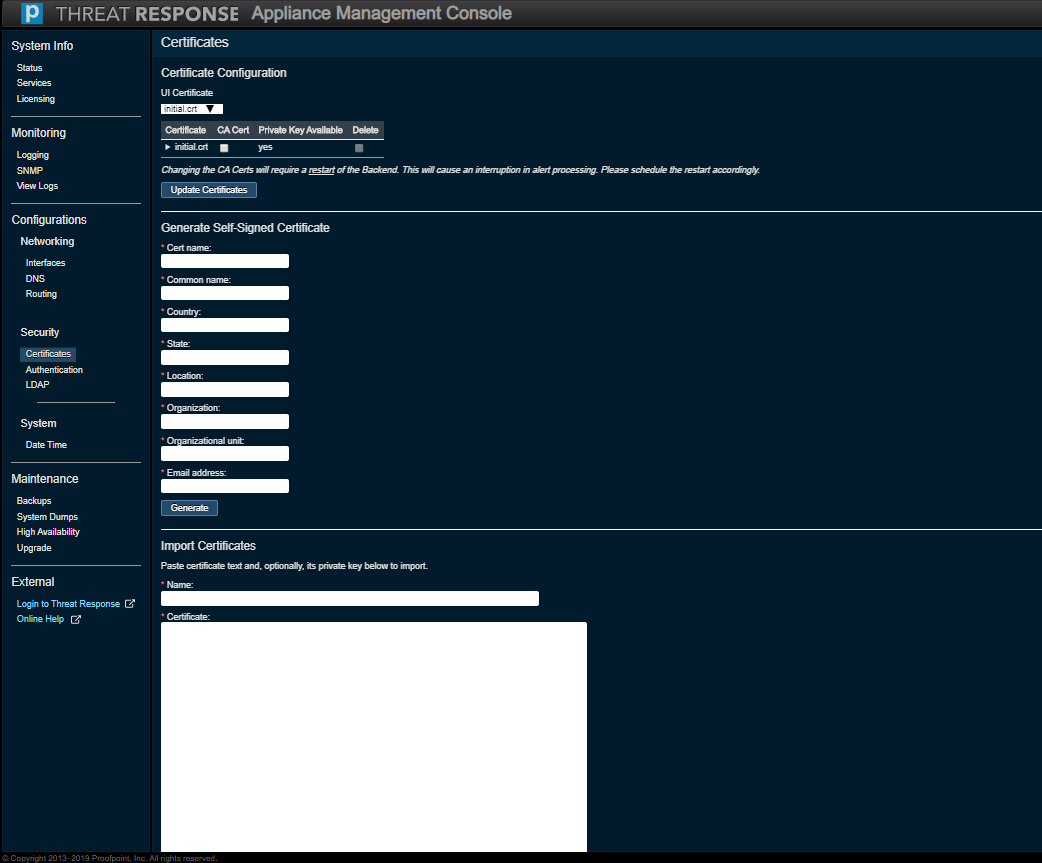
Security (Certificates)
Use this option to monitor or modify the Certificate settings for secure and non-secure Web addresses.
Note
Threat Response uses self-signed certificates by default. If you use an outside authority, enter the certificate text as well as the private key when importing this certificate.
Security (LDAP)
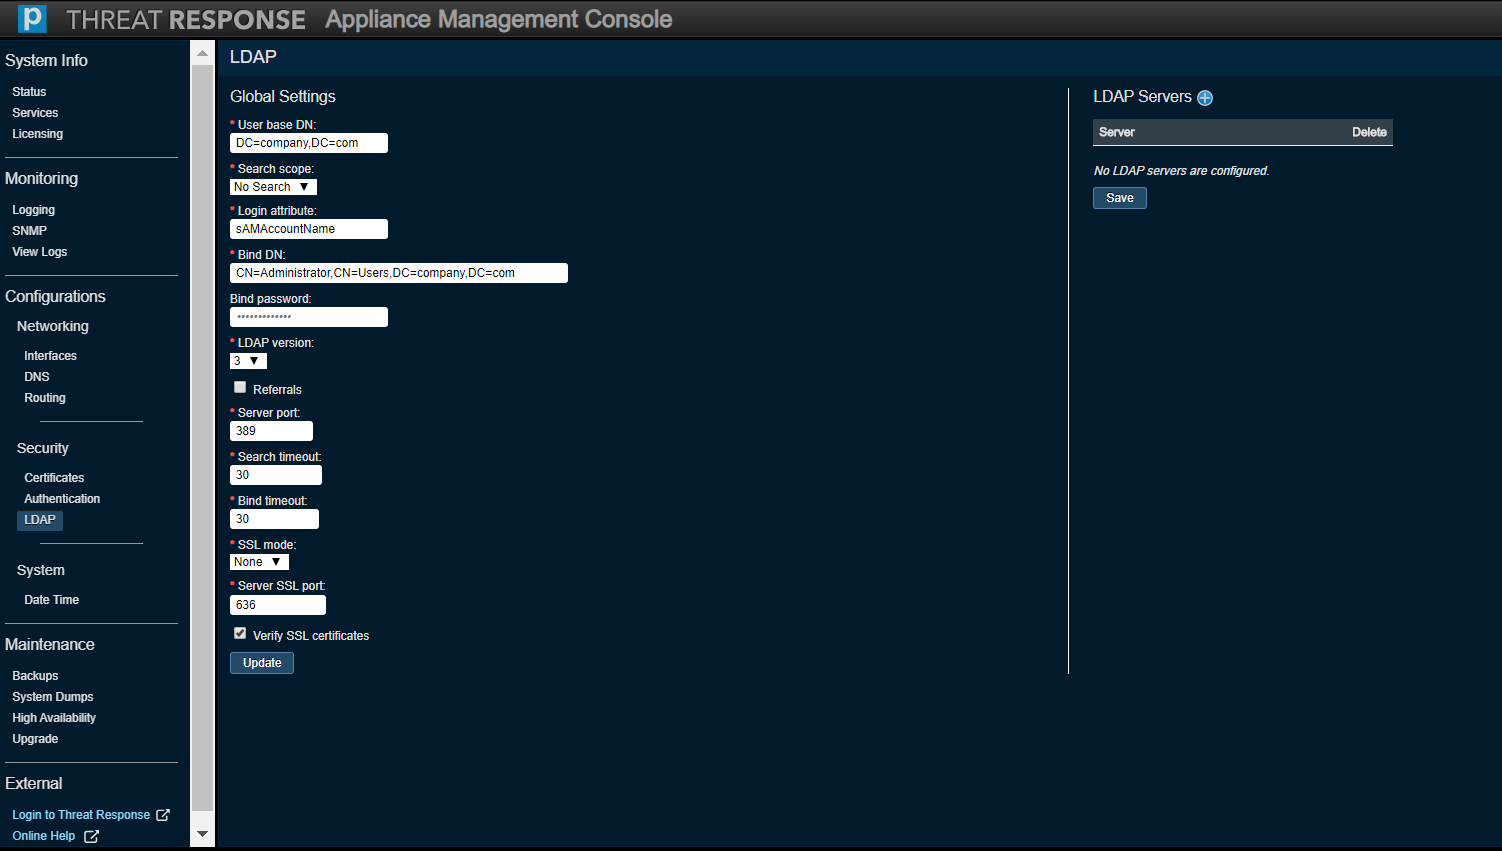
Use the Global Settings section to monitor or modify current LDAP settings across all LDAP servers configured on the appliance.
Use the LDAP Servers section to add or remove LDAP servers.
System (Date and Time)
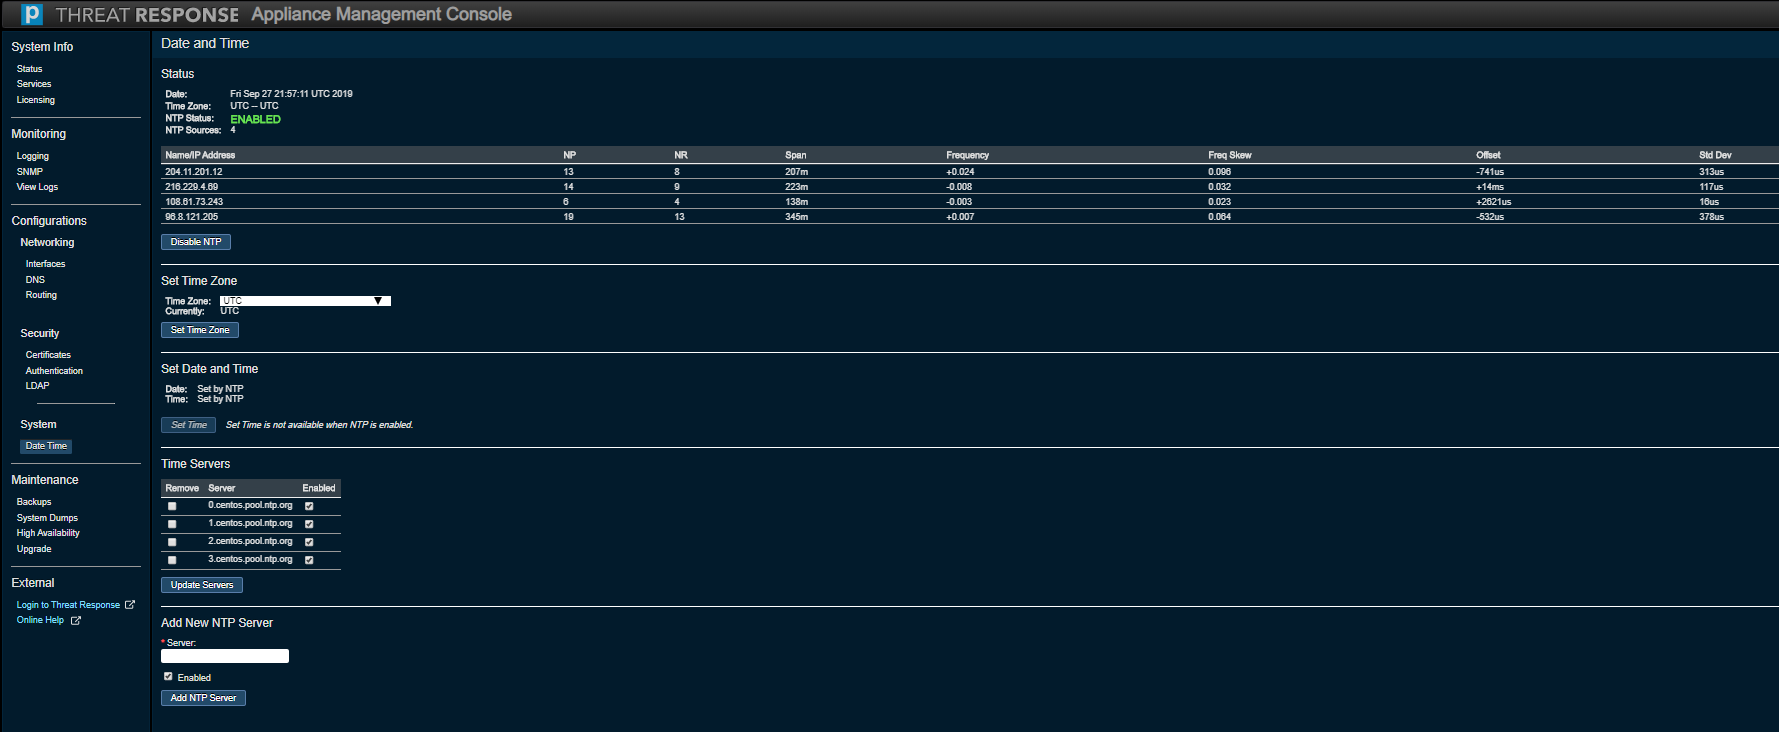
Use this option to monitor or modify the Date and Time settings for Threat Response.
Choose the correct time zone for the Threat Response appliance and click on Set Time Zone.
This section can also be used to monitor or modify the Network Time Protocol (NTP) settings for Threat Response, enable or disable NTP, and add/remove NTP servers that are used by Threat Response for time synchronization.
Note
The new console permits the addition of Time Servers using a hostname or an IP address.
Maintenance
High Availability
“High Availability” is essentially clustering. Given that your machine can fail, it is important to be able to recover from such a failure. Thus it is necessary to employ a second machine (also known as a standby computer or secondary node) to keep the system fully operational. Two installations are bound to Threat Response to “keep tabs” on each other. If the master (or primary node) fails, then the standby takes over. Ultimately, the master is the single source of truth, as all data processing is being done on this machine.
Note
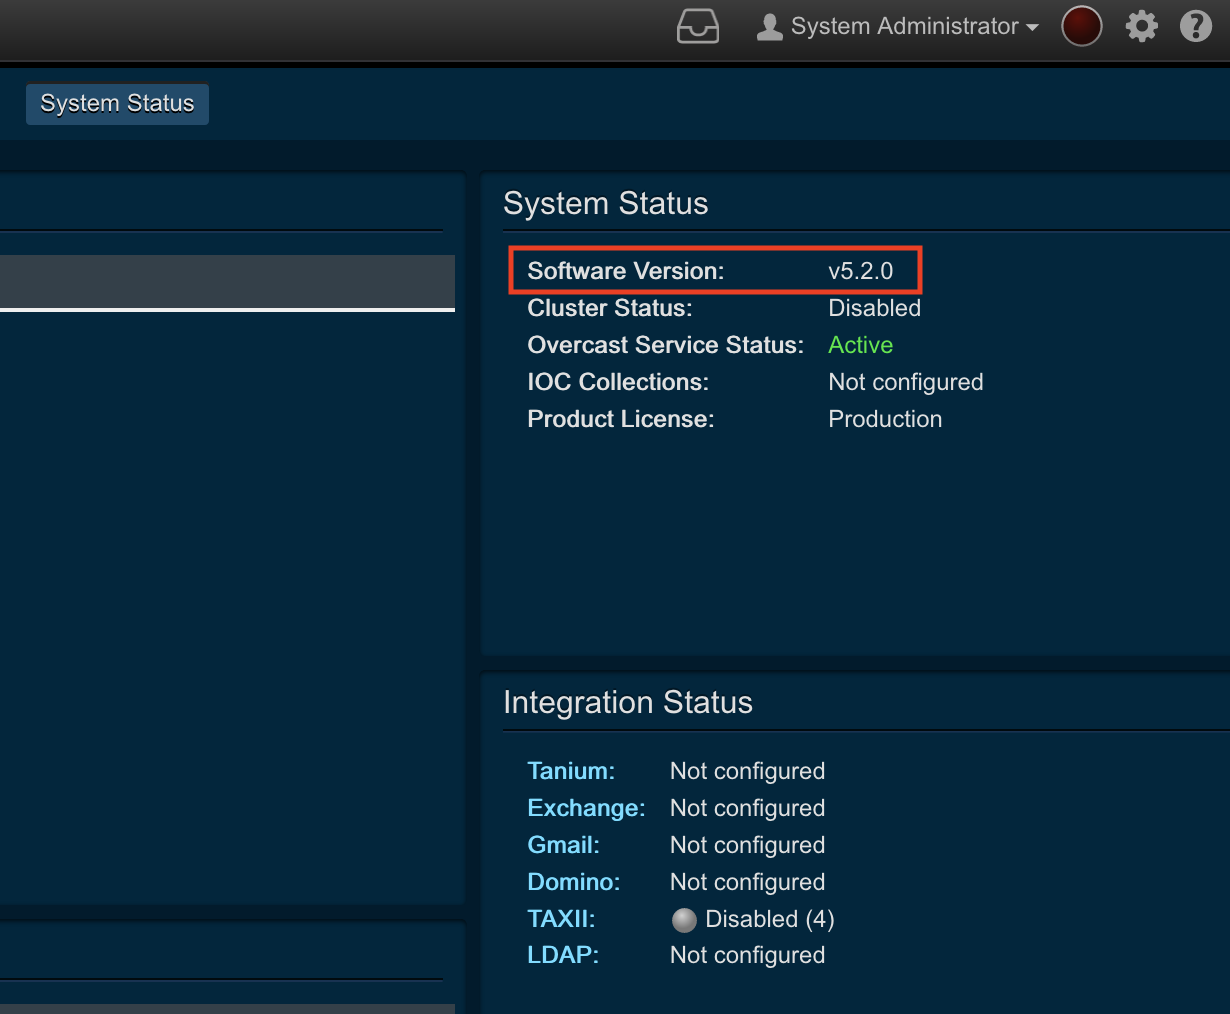
If you are experiencing networking issues, PTR/TRAP (as of v5.2.0) has a built-in callback time of 12 hours for the TAP API. This means that if PTR/TRAP is down for a short period of time, when it comes back online, it will be able to retrieve the last 12 hours of data from TAP.
If you are experiencing systemic issues in the hypervisor, PTR/TRAP supports using most tools you already have in your environment to achieve high availability, whether this is datastore snapshots for quick restoration or vMotion to move the appliance to another location.
Our recommended approach would be to use vMotion to move the appliance to another location. Full details about using vMotion can be found in VMWare’s documentation.
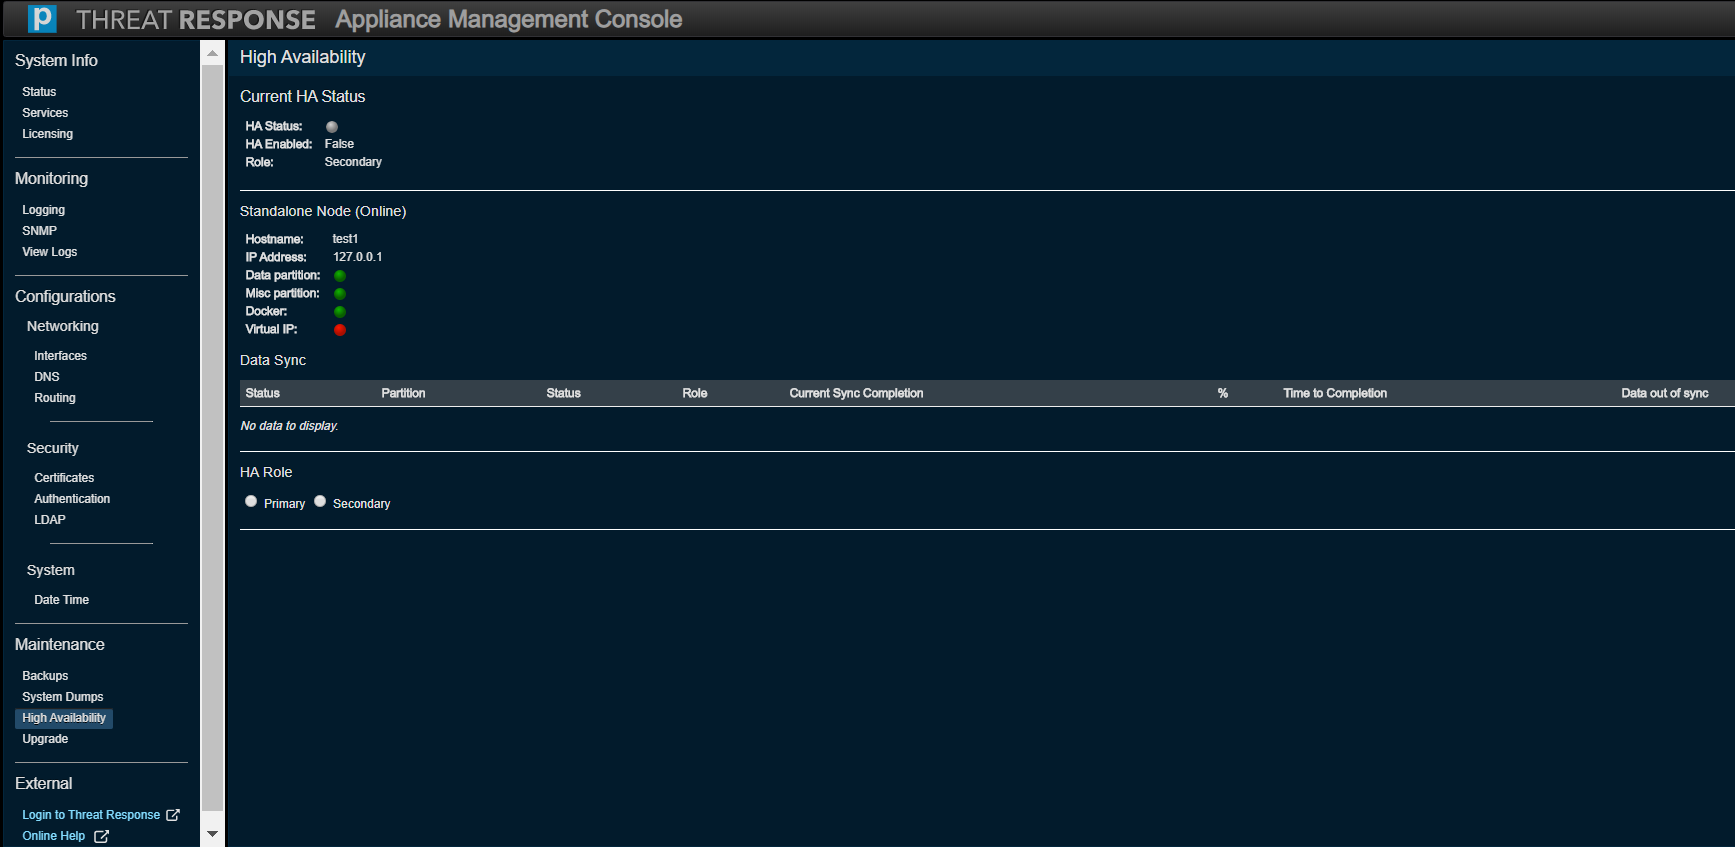
Refer to the New Clustering Guide for detailed instructions on how to set up High Availability for two instances of PTR/TRAP.
Note
The High Availability feature is not available for use with a PTR/TRAP instance running inside an AWS environment. This menu option (and screen) is not visible on such an instance. It is recommended that you should use other options available in AWS to guarantee uptime. See below.
- Use Amazon CloudWatch to monitor uptime.
- Enable Termination Protection for your PTR/TRAP Amazon Elastic Compute Cloud (EC2) instance.
- Take regular snapshots of the instance for attachment to Amazon Elastic Block Store (EBS).
Backups
This section is used to
- create and manage system backups,
- restore a system to a previous backup, and
- manage or restore the master secret file for the appliance.
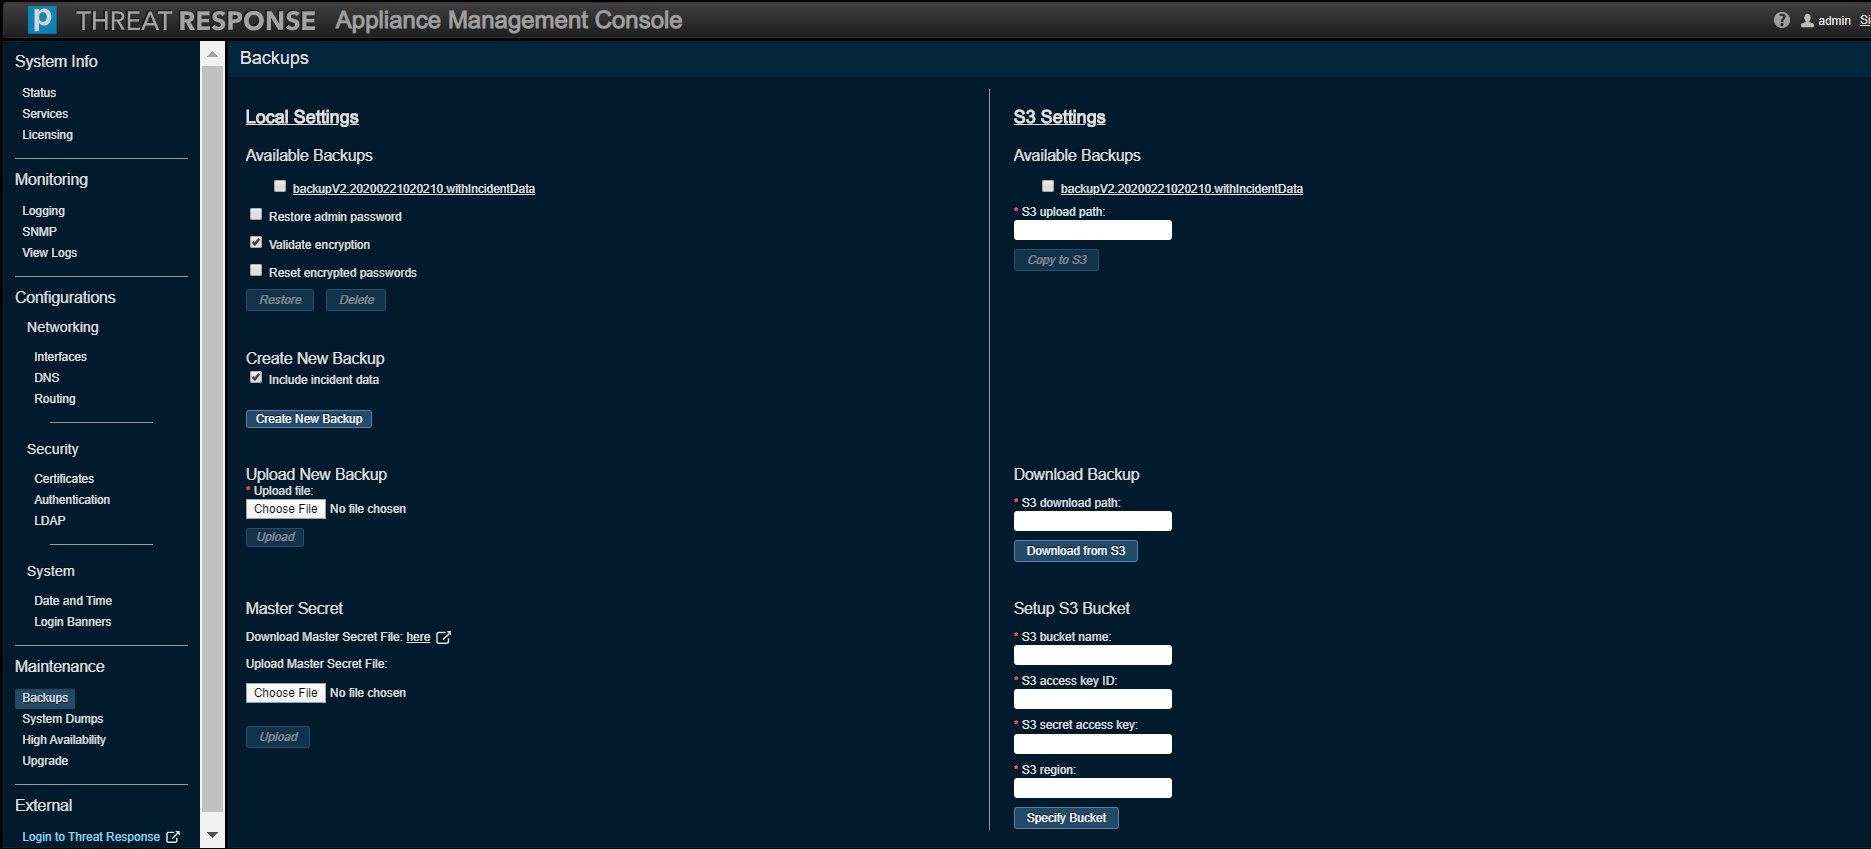
A system backup can be made and copied to an Amazon Simple Storage Service (S3) bucket starting with PTR/TRAP Version 5.1. This capability is especially useful for when a PTR/TRAP instance runs inside an AWS environment.
The following fields must be filled in to access an S3 bucket:
- S3 Bucket Name, e.g. s3://proofpoint
- S3 Access Key ID
- S3 Secret Access Key
- S3 Region
Tip
Refer to the AWS Installation Guide for the mechanics of these values.
Once you have inputted these values, click on Specify Bucket, then they will be saved on the system.
Perform the following steps to save a system backup to the S3 bucket:
- Choose a backup file under Available Backups.
- Specify the S3 upload path, e.g. /threatresponse/backups/
- Click on Copy to S3.
Complete the following steps to restore data from a backup file saved in an S3 bucket:
- Specify the path of the backup file related to the S3 bucket in S3 Download Path, e.g. /threatresponse/backups/backupV2.20200225.withIncidentData
- Click on Download from S3. The backup file will be copied from the S3 bucket to the PTR/TRAP system and then listed under Available Backups.
System Dumps
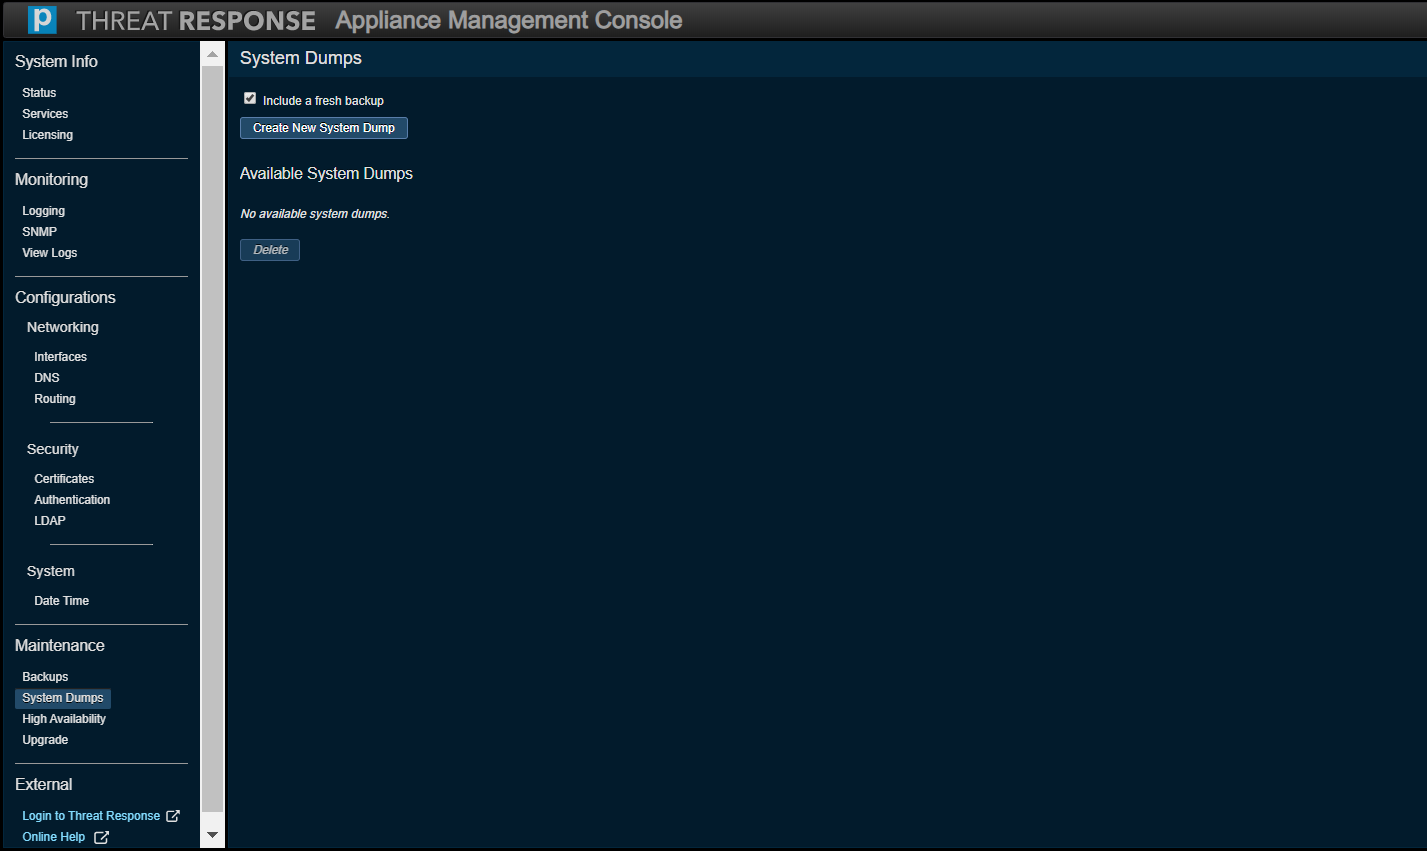
Use this option to troubleshoot your system with our Threat Response technical support specialists. Tthe Create New System Dump button generates a UNIX TAR archive file, which includes log files. Sensitive information, such as passwords and other security information are not included in this file.
Additionally, you can use this section to include a fresh system configuration backup in the system dump file.
System Operations
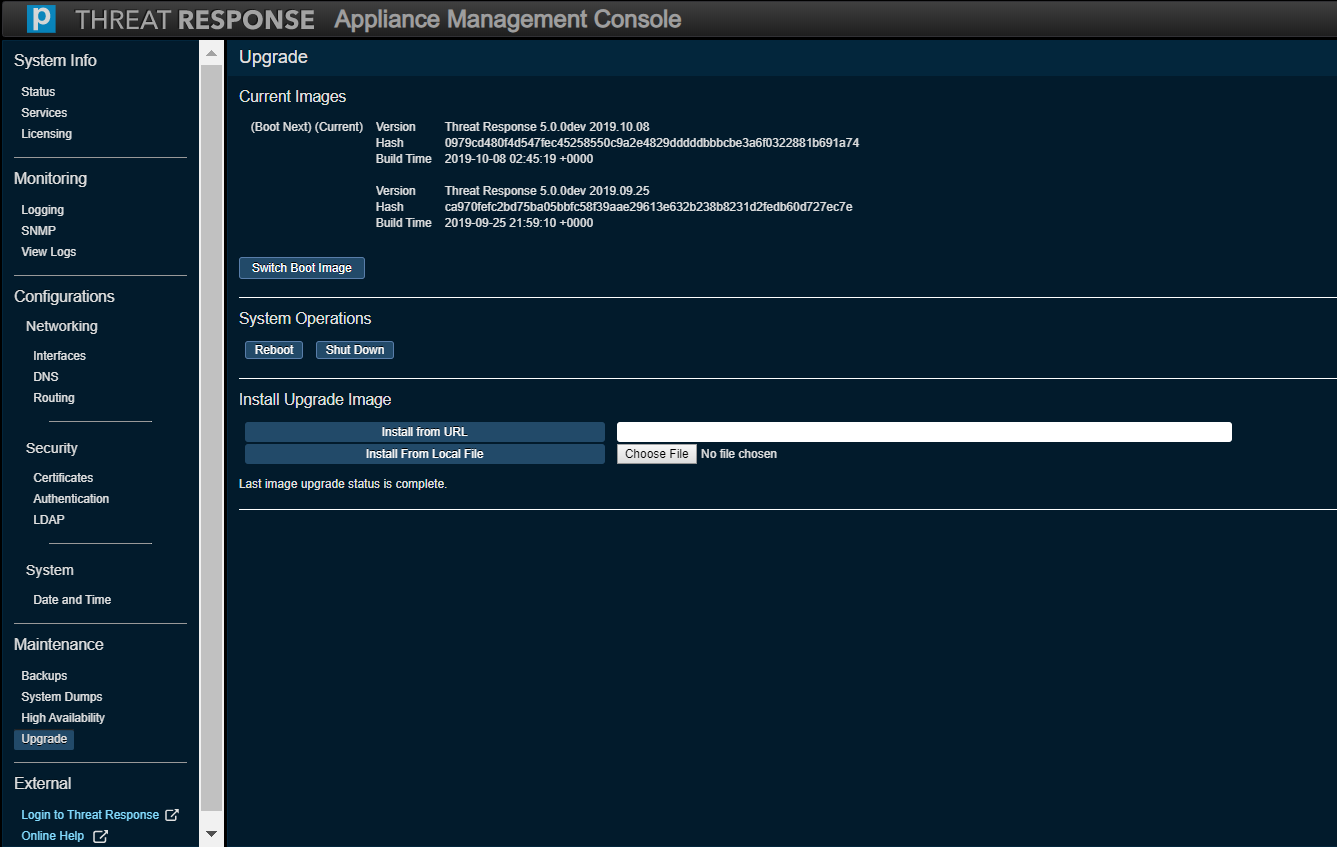
Use Reboot to restart the appliance during a maintenance window.
Use Shut Down to power off the appliance if you plan to deprovision the virtual machine.
Upgrade
Use this option to upgrade Threat Response to a newer version of the application.
Proceed to the Release Notes and look in Download Instructions for the IMG file listed next to Upgrades from 5.0.0 and above.
Important
- You must use your credentials to download the file. Please enter your registered email address (with Proofpoint). In the event that you have misplaced your password, simply click the link directly below the Log In button to create a new password.
- The IMG file is typically over a gigabyte in size and the upload operation can take a few minutes depending on the speed of the network connection.
Steps to Upgrade
Perform the following steps to upgrade Threat Response by using the downloaded IMG file.
- Point to a URL in your environment that contains the IMG file.
OR
Browse and upload the IMG file to the appliance by clicking on Choose File. - Install the upgrade image by clicking on Install from URL or Install from Local File. The new version will be installed on the other partition on the appliance.
- Monitor the status of the upgrade in the new panel that appears on the screen. This process can take several minutes to complete.
-
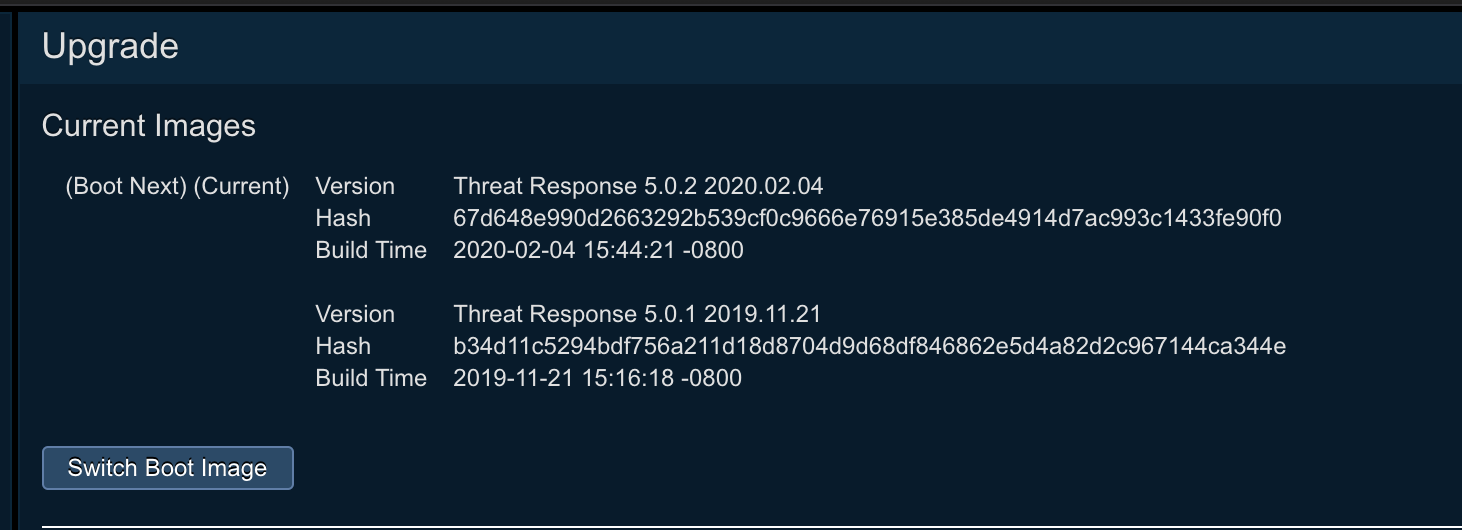
Once the upgrade has completed successfully, the Boot Next partition will be set to the partition with the newly installed image. Verify that this is the case.
-
Click on the Reboot button. This will enable the appliance to boot into the other partition that contains the new version.
- Once the machine has rebooted, ensure that the version to which you are upgrading is correct and that all the services are running with a status of Healthy.
Steps to Recover From a Failed / Problematic Upgrade
If you notice any problems on the new version, perform the following steps to recover and fall back to the older version:
- Click on the Switch Boot Image button to switch the partition of the version that should be active on the appliance.
- The Boot Next partition will be set to the partition with the old version. Verify that this is the case.
- Click on the Reboot button. This will enable the appliance to boot into the other partition that contains the old version.
- Once the machine has rebooted, ensure that the old version is active and that all the services are running with a status of Healthy.
Using the Switch Boot Image
Once you have upgraded and switched to a new version, the Switch Boot Image capability should be reserved for the express purpose of rolling back from a failed or a problematic upgrade. Repeated use of this capability will result in data loss between the two running versions, including the possibility of new alerts, new incidents, and configuration changes on the active version.
Further, do not try to install the same version on both partitions of the appliance. Attempts to do so will result in a failure and can also compromise the integrity of the active running version.
Upgrades for PTR/TRAP on AWS
- The Upgrade menu option (and screen) is not available on a PTR/TRAP instance running inside an AWS environment.
- Refer to Upgrading Threat Response on AWS for instructions about how to upgrade a PTR/TRAP instance that runs inside an AWS environment.
External
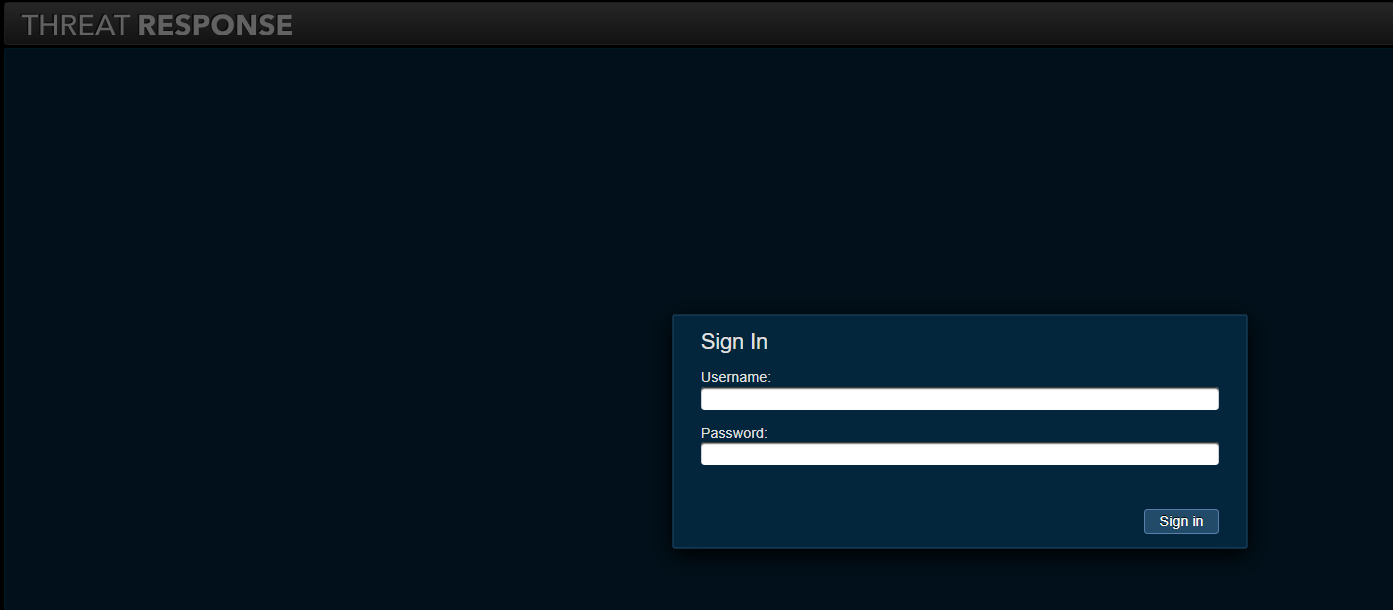
Logging In to Threat Response
Use this link to log in to access the Threat Response application, or more specifically, the Threat Response “instance.”
Online Help
This option facilitates access to our online help portal.
Resetting the Administrative Password
VMware
The process of resetting your “admin” password is summarized below. Note that you will need console access in vSphere to proceed.
- Reboot or power up the appliance.
- Press esc to stop the boot process when the bootloader screen appears (after the VMware BIOS screen).
- Press ‘e’ (stands for ‘edit’).
- Look for the line that begins with ‘linux16’ and then add ‘ init=/bin/bash’ to the end of it.
- Press ctrl-x to boot.
- Make the filesystem writeable when it drops to a shell: mount -o remount,rw /
- Run: ‘/bin/bash /sbin/resetpw.sh’
- Enter the new password and then verify it.
- Enter “sync,” then press Enter to write all the data to the disk.
- Restart the virtual machine. The new password will be in sync with Threat Response upon its startup. Importantly, the virtual machine must finish booting. Finally, attempt to log in throughout, namely, the system UI, PTR UI, and SSH.
AWS
The process of resetting your “admin” password, specific to an instance running in an Amazon Web Services (AWS) environment, is summarized below.
- SSH to your Threat Response instance as an ec2-user.
- Run: ‘sudo /bin/bash /sbin/resetpw.sh’
- Run: ‘sudo reboot’ once you have reset the password.
- Log into the UI and set the admin password again, otherwise it will be overwritten.